Dusting cocktail glasses is a unique way to garnish a cocktail. You can see glasses coated in every color in bars, online, and on social media.
Perhaps you wonder what that powder is and how you can apply it to a cocktail glass? Then you found the right place.
I will explain how to do it and how to make dusting powder from ingredients you have at home.
Dusting isn't a recent invention. It has existed for a long time already.
However, it's a skill that had been mainly used in restaurants. There, it is used mainly for decorating plates, not so much for glasses. And it wasn't something you would often come across in people's homes. But with social media, that changed.
When applied to a plate, the visual effect is the most important. But used on a cocktail glass, it's different.
You might touch it when holding the glass, or you smell and even taste it while sipping your drink should the dusting be applied to the rim of the glass.
Consequently, dusting cocktails alters the drinking experience as a whole. It can improve the visual appearance while adding another dimension to experiencing the drink.
Applying powder or dust to a cocktail glass is fairly simple. There are several ways to do that, depending on the result you want to achieve.
The easiest method is to chill your glassware in the freezer, then fill it with ice after taking it out. That will cause condensation on its outside, which in turn helps the dusting or powder to stick.
If you want to highlight or complement certain ingredients in your cocktail, you can also work with flavored variations. For that, you can use an atomizer to vaporize a liquid and apply it to the glass.
Then spend the powder equally on a plate or a chopping board and roll the glass in it. - The Powder will stick to the moist parts and fall off the rest.
For instance, spray a rose-flavored cocktail with rose water and apply rose petals (whole or ground into powder).
Diluted orange flower water and water mixed with citrus juice, Absinthe, or other kinds of alcohol also work perfectly.
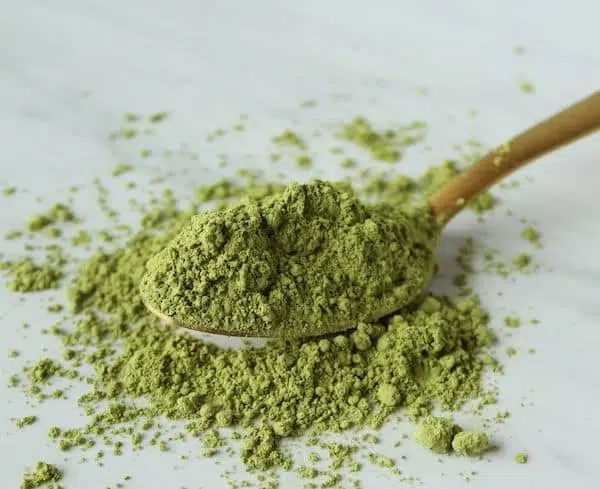
There honestly are no limits on what you can use to dust cocktails. Cocoa powder, powdered sugar, and salt are just some examples.
You can create a powder from all kinds of things and apply them to your glass. Think raspberry, strawberry, matcha, mango, or even powdered flowers. Just ensure they're edible.
There are many readily available options available to dust cocktails with:
Cocoa powder, matcha powder, or coconut flakes are all fantastic choices to improve the appearance of your cocktail. Yet, if you are after something more fruity to match a raspberry or strawberry cocktail, you best create it yourself.
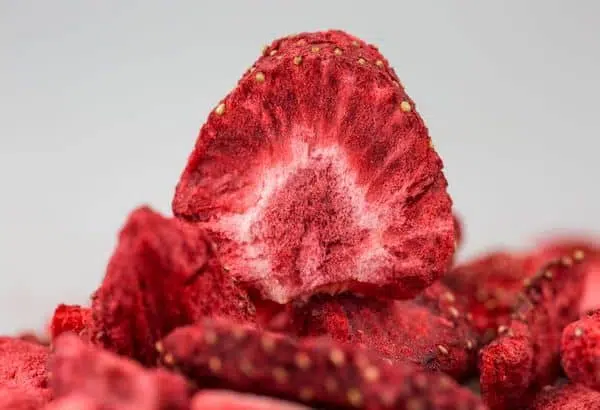
The simplest way to do this is to use dried fruits and then pulverize them. For that, you need to dehydrate your raspberries, strawberries, bananas, blueberries, pineapple, or even lemon peels:
Dice the fruits or cut them into discs, place them individually on a baking tray, and put them in the oven at low temperature. Then crush and ground them until they transform into a fine powder. If that sounds too time-consuming, you can also use a blender.
Just check beforehand that the fruits are thoroughly dried and crispy before you start creating your fruit dust. Otherwise, you end up with a sad version of a dry, flaky raspberry mush.
If you work at a bar or restaurant and have access to liquid nitrogen, this will save you quite some time. Frozen with liquid nitrogen, you can take fresh berries and pulverize them within minutes.
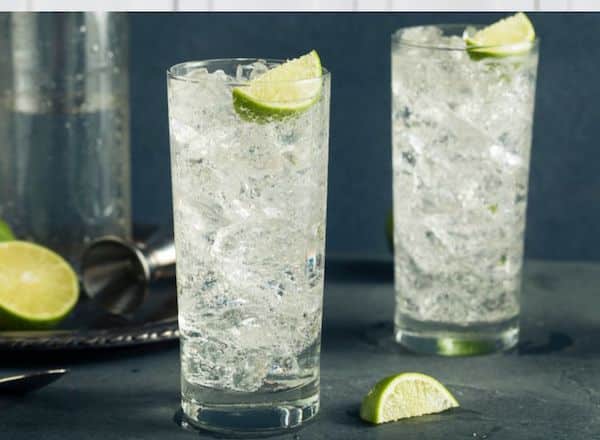
The Gin and Tonic recipe is easy and straightforward, with a long history. The refreshing drink is made of one part gin and three parts tonic water. But it's important to pay attention to all the little details to take the drink to the next level. We share them with you: starting with the ideal ratio of Gin to tonic water, the best gin for the cocktail, and the way to the best ways to garnish it.
Learn how to mix this refreshing two-component summer drink and how to serve it to your guests.
A ratio of 1 part Gin to 3 parts tonic water is preferable. But no recipe will work for everyone and every combination.
Some prefer to let the Gin shine, while others are looking for a drink with a lower alcohol level. Everything from 1:1 up to 1:4 is practicable and can produce excellent results.
The key to a great Gin and Tonic recipe is the perfect balance of ingredients. You want just the right amount of bitter flavor from the tonic water paired with the botanical notes of Gin to create the best Gin and Tonic possible.
If you get that right, you can even highlight the distinct flavors of a gin, by garnishing it with botanicals that either emphasize its ingredients or complement them.
Here's what you'll need to make a refreshing Gin and Tonic:
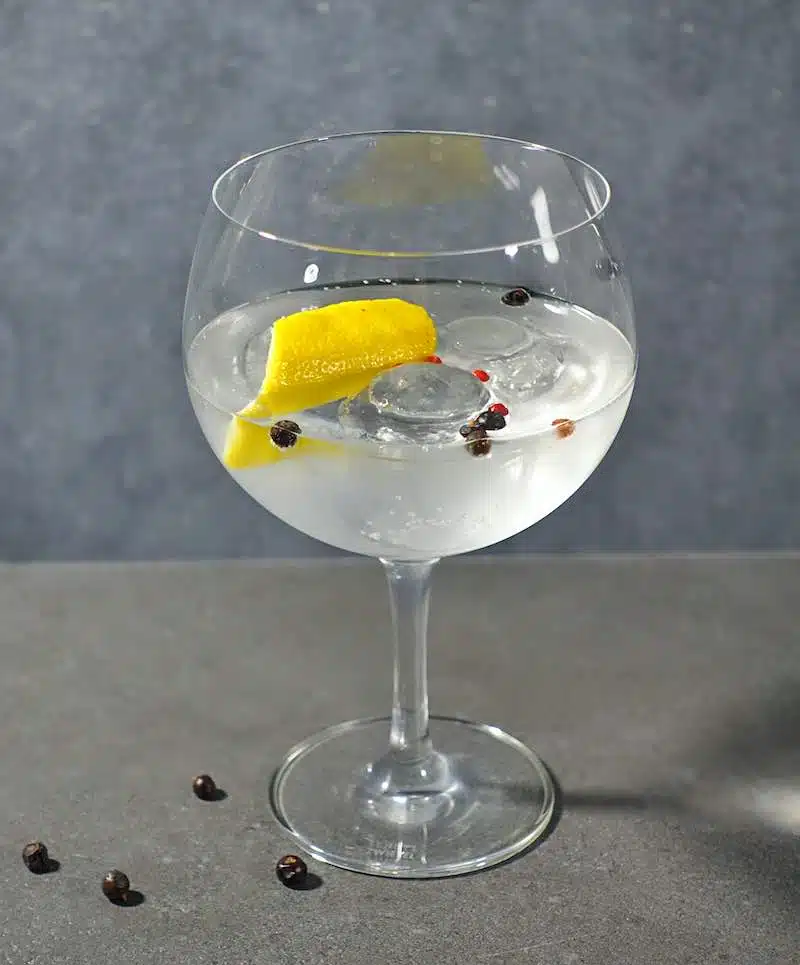
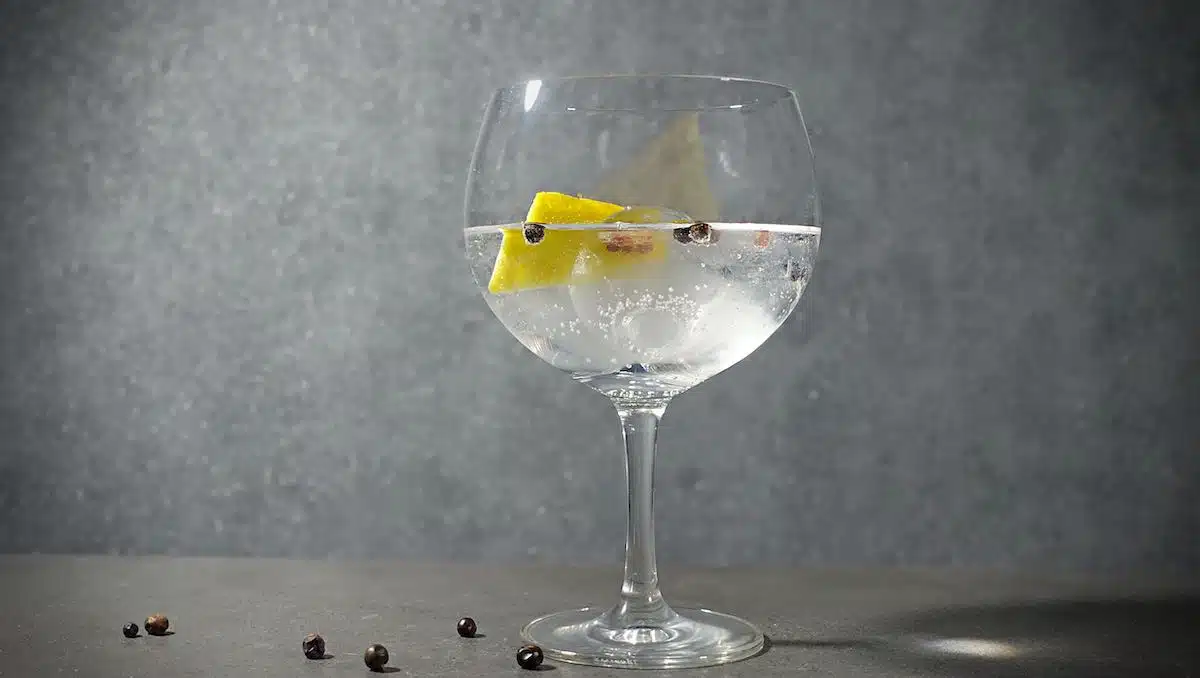
To serve a Gin and Tonic in style, there's still something important missing from the best Gin and Tonic, the glassware.
The G&T is technically a Highball and, thus, often served in a classic Highball glass. While this is perfectly fine, there are some other options to consider.
My two favorites are the balloon-shaped coppa glass that has plenty of space for an extra ice cube out of two, and a heavy crystal glass (somewhere between Highball and Collins). For more details on glassware, check out our guide to the best glasses for a perfect Gin and Tonic.
The Gin and Tonic history is full of tales and legends. For example, the most common story of how the cocktail was invented is that British Navy soldiers developed it as a form of Malaria prevention. Allegedly, they combined their bitter-tasting tonic water with gin to make it taste better.
However, a 2004 study shows that this story is most likely untrue. There is also no real evidence to support this theory. based on historical documents, it's more likely that the early Gin and Tonic was a refreshing drink mostly consumed in tropical climates.
Multiple sources indicate that the drink was most likely invented in India and not by soldiers of the Royal British Navy.
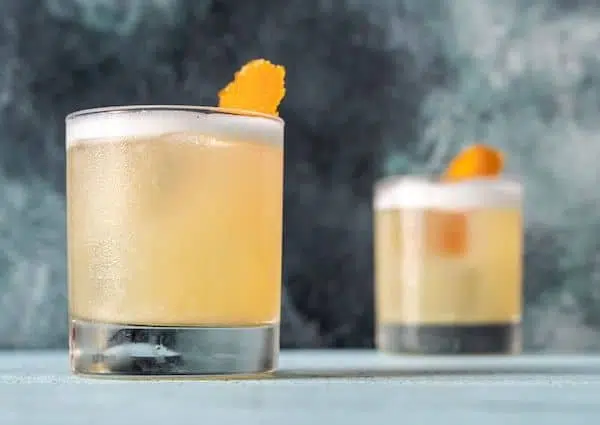
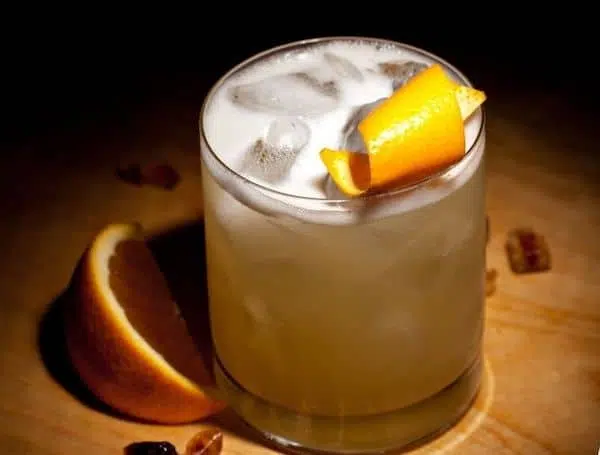
The Stone Sour Cocktail is a refreshing drink you can easily make at home. It is a twist on the classic Sour Cocktail with the additional use of orange juice and apricot. That's not covering all aspects of the drink, but it gives you an idea of its taste.
Quick Facts Stone Sour Cocktail
The Whiskey Stone Sour, the most famous version we make here, is a close relative of the Whiskey Sour. Apart from that, Amaretto, Rum, and even Tequila Stone Sours are among the more popular choices.
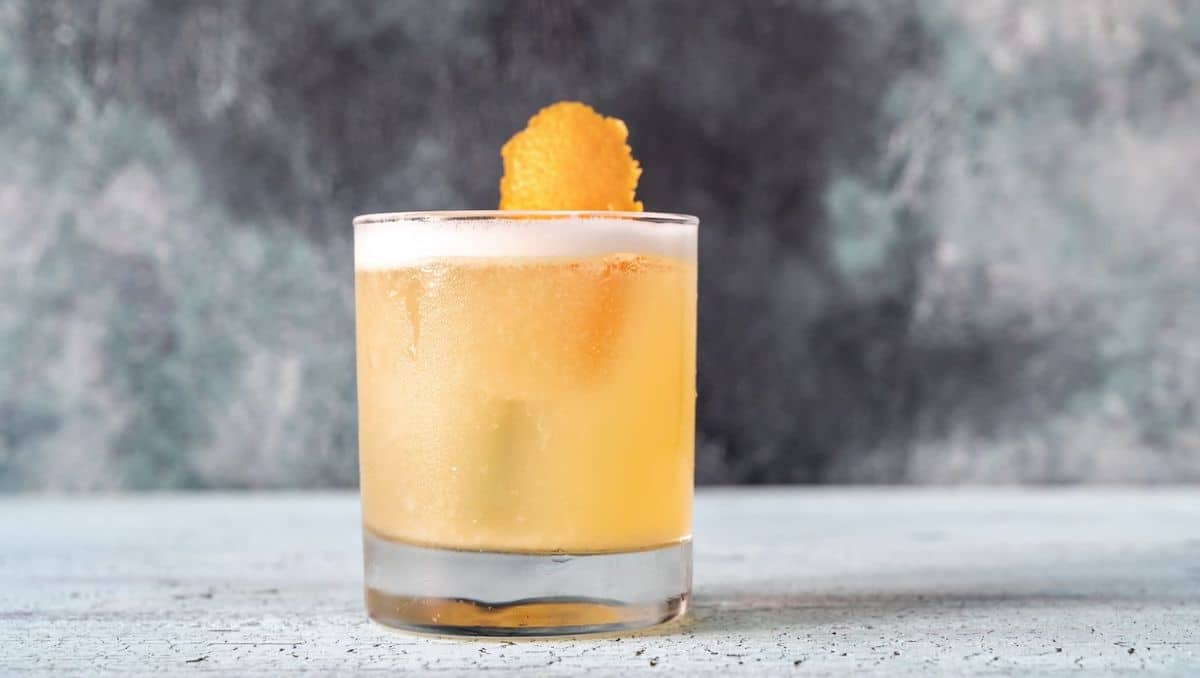
Following the regular Sour Cocktail template, the Stone Sour calls for a base spirit, lemon juice, and simple syrup. Additionally, you need orange juice and Apricot Brandy to make this cocktail:
Freshly squeezed orange juice is a must. Other than that, it's quite a simple and easy drink to make. That is absolutely vital, though, to get a proper craft cocktail. The same goes for the lemon juice. Bottled citrus juice is a no-go in mixology.
Apart from that, we have a few best practices for you to keep in mind when mixing:
As mentioned, other versions are also pretty famous. The Amaretto Stone Sour, for example, can be found on many bar menus. The Apricot Brandy part is left off here, making the drink even more similar to a classic sour version.
Another well-known variation would be the Tequila Stone Sour. Many recipes include orange juice as well as triple sec. The triple sec works great with Tequila - we also know that from Margarita cocktails- and, therefore, is a fantastic addition to this Stone Sour.
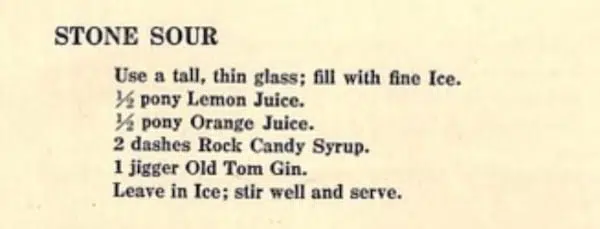
American bartender Tom Bullock is widely accepted as the inventor of the first version of this cocktail. His cocktail book "The Ideal Bartender" featured the first recipe with orange juice but without Apricot Brandy.
His version of a Gin Stone Sour marks the starting point of Stone Sour history. The book had been published in 1917, shortly before prohibition. No wonder the cocktail vanished for quite some time.
In the early 1970s, the Stone Sour with orange juice resurfaced in country clubs across the US. It's hard to find out how and why the recipe spread, but it did. A little later, by the 80s, the recipe was quite common and well-known.
It was mentioned in "Sardi's Bar Guide", published in 1988, which described the cocktail as a sour "with the addition of orange juice."
In the decade after that, the drink had its most triumphant time. During the 90s, in some parts of the US, the drink was so popular you were hard-pressed to find someone who didn't know it.
With the new Millennium, the popularity of the Stone Sour Cocktail declined, and it fell into oblivion again. As with most things, it likely will have a comeback at some point. However, at this point, while you can still find recipes online in all kinds of variations, the hype is not there anymore.
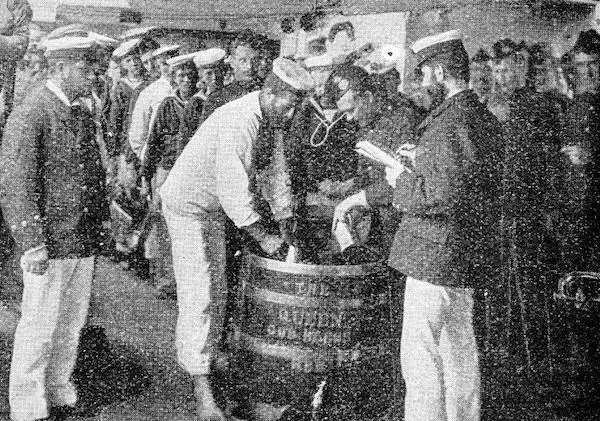
Tom Bullock was not only the inventor of the Stone Sour, but he was the first African American to publish a cocktail book. His book "The Ideal Bartender" gives an excellent impression of how pre-prohibition drinks looked and tasted.
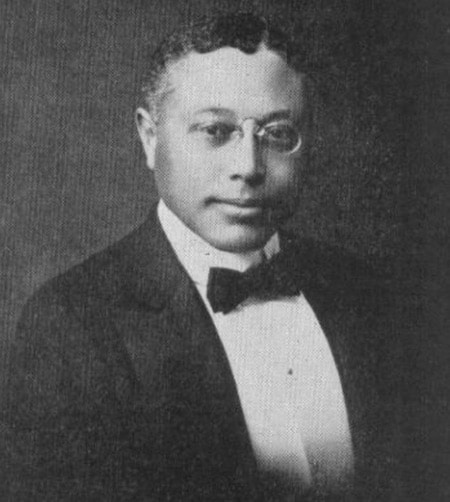
What makes the book stand out even more is that Bullock did not use modified versions of existing cocktails. He made his very own, unique creations. -Something you won't find very often.
If you want to read more about Tom Bullock and his legacy, there is a brilliant article about his life as a bartender. You can find it here.
Apart from the variations of the Stone Sour mentioned above, there are countless other creative Sour Cocktail recipes you should try at least once. Three of those are:
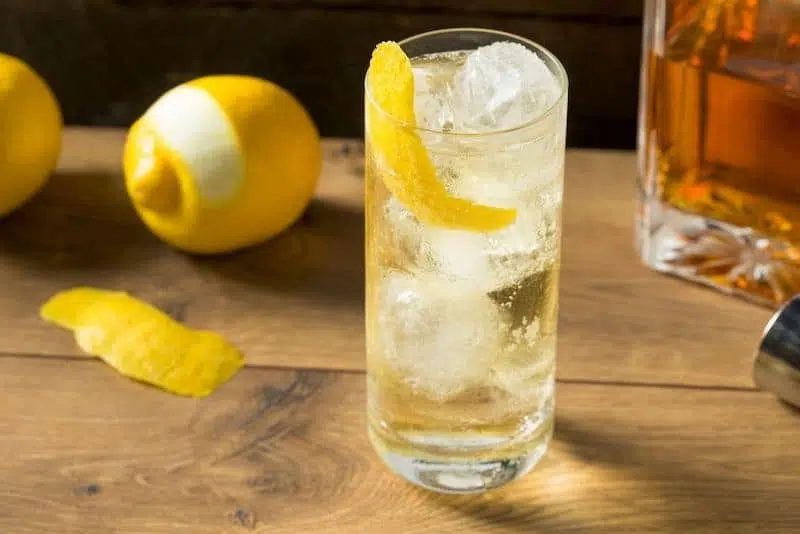
Essentially, a Highball is a specific kind of cocktail. It describes a drink consisting of a spirit base, lots of ice, and a filler that is, in most cases, carbonated. It comes in a narrow and tall glass - the Highball glass.
While it's technically the same as the typical Vodka soda long drinks you'd order at a club, a well-executed Highball can be far better than that.
The word Highball already implies a certain quality level and that time and effort go into creating this drink. You have to focus on execution when creating a Whiskey Highball. Thus, you don't just call it Whiskey soda. It's better than that.
Besides the general formula of spirit, carbonated filler, ice, and optional extras, a Highball always is served as a finished drink.
You won't get the mixer at the side to adjust the ratios. -That would be a long drink instead. And due to the specific glass design, a Highball contains proportionally more alcohol than a long drink.
Also, a Highball is a kind of cocktail. That means, technically, every Highball is a cocktail, but not every cocktail is a Highball. But why is the drink called like that?
While it's not 100% clear where the name came from, there's evidence that it goes back to drinks served in tall glasses in old steam trains.
In that context, highballing refers to a ball indicating boiler pressure when the train gets to full speed. -I kind of like the thought of this. It instantly makes me feel like having a Scotch & Soda on one of the retro steam trains.
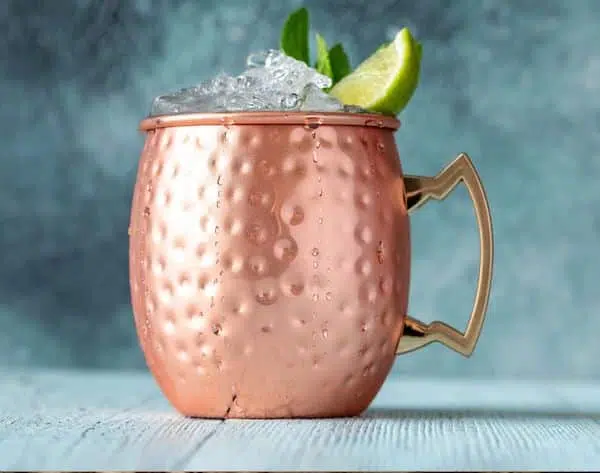
Having said that, Scotch & Soda is probably one of the most commonly known Highball cocktails. And there are other equally famous Highballs like the Gin & Tonic, Moscow Mule, and Vodka Cranberry.
Highball drinks only contain a few ingredients. Hence, it's crucial to use quality products and the right ratios of ingredients. Using a cheap soda from the house brand of your supermarket is not a no-go in general. But when putting together a Highball, you want something better than that.
I recommend a club soda or a Fevertree tonic. For Gin & Tonic, this is already common sense, but it should be for every Highball cocktail.
Besides the quality of ingredients, the way you use them and the ratios of spirit to filler are equally important.
Typically, you chill your liquor and the filler even though the drink comes on ice. This way, the ice will melt slower, and the carbonatation lasts longer.
Highball cocktails have their own glass design. The Highball glass is slim and tall, containing between 8 and 12oz.
As the name signifies, it's higher than an Old Fashioned glass (also called lowball glass) and a bit wider than the super-slim collins glass.
Often Highball cocktails are served in this distinctive glass. However, some more popular Highballs have their own signature cups or glasses. Two well-known examples are the copper mugs for Mules cocktails and the Gin & Tonic glasses.
Many people claim that they created and served the first Highball cocktail.
One of the more likely stories is that the Highball was brought to Manhattan, New York, by the English Actor E.J. Ratcliffe in the late 19th century. [1]
And almost all of the first Highballs were Whiskey Highballs. Whiskey watered down with soda, plain water, or ginger ale, therefore, was the start of Highball culture.
The Highball cocktails are extremely popular in Japan and a common alternative to beer during dinner. After office hours, many Japanese workers head to their favorite Izakaya to eat and have an alcoholic drink to mark the end of the working day.
Izakayas are best described as a mix of a Tapas bar and a pub, offering small dishes and alcoholic drinks.
Japan has a long tradition not only of drinking but also in creating great Whiskey. Due to a difference in their genes, many Japanese can't consume drinks with high alcohol percentages.
That is why Japanese Whiskys usually are created to be mixed and not to be drunk pure or on ice. That's one reason why the haibōru (ハイボール), a Japanese Whisky Highball, is so popular.
The Whiskey Highballs are tasty, strong-flavored drinks with just the right amount of alcohol. Many would choose a haibōru over a beer as an after-work drink anytime.
This trend in Japan led to many different Highball recipes. Besides haibōru, chūhai (created with shōchū, a traditional Japanese Brandy) is also pretty famous.
The Highballs you buy in Izakayas are affordable and cost between $3 and $4.50. These low prices are undoubtedly responsible for the high number of Highballs consumed in Japan.
Besides the Izakayas, other bars in Japan also celebrate the simplicity of Highballs. You can get them at prices from $5.50 to $9.
In more sophisticated places, everything is thought through: from ice to glassware, from the Whiskey to the filler. Every Highball served is meant to be an experience.
It is a form of art to showcase the quality ingredients and the aim for the best possible result. That is why they don't call their Highball cocktail a Whiskey Soda.
If you're curious now, here's a recipe and instructions on how to make the perfect Japanese Highball.
The key difference between a Lowball and a Highball is the glass. The Lowball glass, also called Old Fashioned or rocks glass, is smaller than a Highball. This choice of glassware also determines the amount of filler used to serve it.
That means, in comparison to a Highball, the Lowball contains way less filler. It is supposed to be "spirit with a splash of filler". Since this simple, watered-down drink is currently not that fashionable, people tend to forget where the name originates.
To visualize this difference, here's an example: if a G&T Highball is served with 1 part Gin and 3 parts tonic, a Lowball version of said drink could be 1 part Gin to 1 part tonic water.
The tequila boom is not over yet, the mezcal trend is just starting to take off. Whether you're looking for something to mix in a cocktail or a bottle to sip neat, here's our list of best Mezcal bottles to try right now.

1
Montelobos uses an organic Espadin agave and only produces small batches to perfect flavor, taste, and balance.
With its smooth, crisp, and smoky flavor Montelobos Espadi Joven is an excellent choice to drink neat. -But it's even better in cocktails.
2
Produced in Santiago Matatlan Valley of Oaxaca, this Mezcal works perfectly in a Margarita. It is light, a bit smoky, with notes of citrus and vanilla.
Legend says that founder John Rexer smuggled it out of Mexico to Antigua, Guatemala. That is why Ilegal became the name of the brand. The Mezcal is still served in his bar in Antigua, Café No Sé.


3
Agave de Cortes is a high-quality Mezcal with an earthy smell and smoky taste. It is one of the best choices if you're after good value for money.
The earthy, spicy scent combined with its sweet and smoky taste works excellently in cocktails.
4
San Baltazar is a creation of the Soledad family, a brand that manufactures a whole variety of Mezcal.
For San Baltazar, the Mezcalero uses century-old traditional methods to create this amazing spirit. Its deep flavor profile is outstanding: Bee pollen and grassy notes with smokiness and hints of bacon.

.

5
Del Maguey is one of the first Mezcal brands that reached a broad public. It is a classic, high-end product that you should enjoy neat.
This expression is a blend of maguey Tobala and Espadin. The quality and flavors are excpeptional. It's warm, extremely smooth, citrusy, and fruity without being too sweet. Certainly one of the best Mezcal right now and a great addition to any bar cart.
6
Alipus is one of my favorite Mezcal brands at the moment. The XX San Andres bottle has everything I want from a Mezcal. It is clean, elegant, rich, complex, and woody Joven with a bit of minerality. These clean flavors make it also an ideal choice for beginners.


7
A beautifully designed black bottle is the first thing you notice about this Mezcal. But not only the mystic-themed exterior is a winner the inside is just as good. The flavor profile contains notes of chocolate, fruits, baked sweets, and a bit of char. Simply a full-flavored Mezcal that won't disappoint.
8
The makers of Gracias a Dios are very passionate about their Products. Their Espadin Mezcal contains typical earthy and smoky notes combined with hints of pepper, grass, and mushrooms.
It's a well-made Oaxacan product with a classic profile. If you're looking for a great all-around Espadin, that one will be the perfect option.


9
Another entry from Del Maguey. This Mezcal is made of the rare Tobala agave. That sort of agave plant only grows on a few mountain slopes in Oaxaca. That is also reflected in the price. But I promise you it is worth it.
10
This is a unique Mezcal from the state of San Luis Potosí. Made of wild-growing Salmiana agave and steam roasted in a brick oven instead of traditional pit roasting. That result is a super unique Mezcal.
You'll notice none of the usual smoky taste. Instead, notes of eucalyptus and bell pepper create a unique flavor profile.
This unusual mix makes an interesting ingredient for cocktails. Try it yourself by using it in a Mezcal Negroni or a Mezcal Paloma.


11
Del Maguey Crema is a dangerously addictive Mezcal. It is based on Del Maguey Vida but with the addition of Miel de Maguey. A syrup made of roasted agave.
The result is a sweet, smoky, and creamy spirit. Very appealing when drunk neat and even better when used in cocktails.
12
Bozal Ensamble is a handmade artisan Mezcal. A good selection if you're looking for one that is sweet and smoky but not too smoky.
The smoky flavor is balanced nicely with citrus, floral notes, and hints of grass. While Bozal is best enjoyed neat, it also works fine in cocktails.

Our recommendations for the best Mezcal bottles to try in 2024 are an excellent start to dive into the savory and smoky flavors of this agave spirit.
Mezcal is often described as a smoky Tequila. While that's not entirely true, it provides a general idea. But "it's not just smoky Tequila," as Ivy Mix, the author of Spirits in Latin America, pointed out. And I can only agree - you can read how Mezcal and Tequila compare here.
If you want to try some of our recommendations, make sure to drink the Mezcal neat. At room temperature, you can best taste the full array of aromas and flavors of this beautiful spirit.
In case the flavors are too strong at the beginning, try to incorporate them into cocktails first. You can mix it into drinks like a Mezcal Margarita or a Mezcal Mule. The other ingredients like lime and ginger beer will balance the bold flavors of Mezcal and make it more approachable.
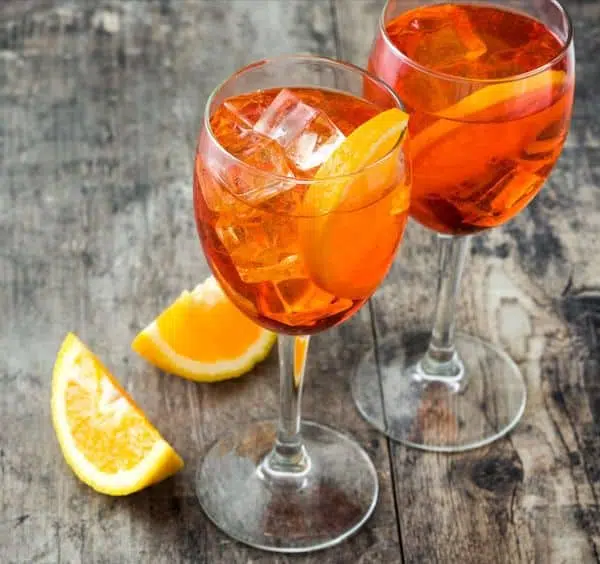
The Spritz cocktail has its roots in the region of Veneto, Italy. In the late 1800s, Austrian soldiers diluted their white wine with a spritz (German for "splash") of water. This made the drink lighter and easier to drink.
Over time, the Northern Italians tweaked the recipe for Spritz drinks. Water was replaced with sparkling water to make it more refreshing. Fortified wines and Amaro liqueurs are added as is Prosecco.
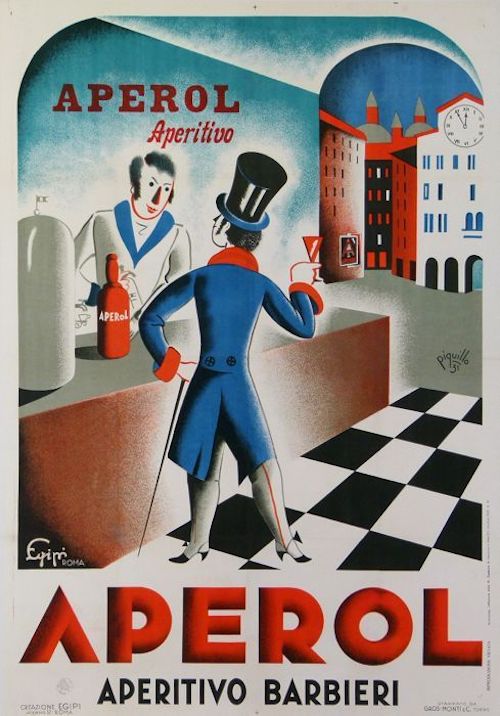
During the 1950s, the Aperol Spritz cocktail was invented by the brothers Luigi and Silvio Barbieri in Padua, Northern Italy and is a fixture in Italian aperitivo drinks ever since.
Jump to History | When was it invented? | When did Spritzes become popular? | "Spritz", "Spritzer", and "G'Spritzter" | Traditional formula | Why are they popular in Italy? | Modern variations | Recipe | FAQs
Although the cocktail originates in Italy, the German sound of the name indicates it's not an entirely Italian creation. In fact, Austrian troopers brought the idea of the Spritz to the Veneto region in Northern Italy in the 1800s. At the time, the territory belonged to the Austrian Empire. [1]
Austrian soldiers, who were not used to the high alcohol content of Italian wine, diluted it with water. By that, they got an alcohol percentage similar to beer. This first version of a "Spritzer" consisted of equal parts soda water and wine.
As the cocktail evolved, the recipes changed, and Italian ingredients were added. A Venetian Spritz, for instance, now usually contains Prosecco, a bitter aperitivo, and soda water.
It took quite a long time for the cocktail to travel across the Atlantic. In the early 2000s, the Campari group, also owning Aperol, brought the "Spritz" to the United States and promoted it as the go-to drink at many events.
That marked the starting point for the Spritz to be one of the most famous summer drinks.
The Aperol Spritz cocktail came up in the 1950s in Northern Italy. The base ingredient Aperol was introduced in 1919 by the Barbieri brothers in their home town Padua, a small town in the Veneto region.
In the 1950s, the Veneto region in general, and Venice in particular, was the epicenter of fashion & food lifestyle. It was the perfect time for an Aperol Spritz to convince the Paduan upper class and the Italian high society. The light and refreshing drink quickly became a popular aperitif and soon after also a sunset sip. [2]
What really pushed the popularity of the Spritz cocktail was a famous marketing campaign launched in the 1990s.
The ads showed young and joyful people enjoying daytime Spritzes. The Slogan of this campaign, "easy, breezy" promoted the drink as an after-work sip to unwind from a difficult day at the office.
At the same time, probably supported by Aperol, bartenders across major Italian cities began serving the drink at their venues. Due to the low alcohol content, they promoted Spritzes as an easy step on the way to lower alcohol consumption.
It didn't take long for the Italians and visitors from surrounding countries to fall in love with the light and fresh summer drink.
In Austria, ordering a "G'spritzter" will get you a glass of wine mixed with soda water, typically in a 1:1 ratio. G'spritzer is also the original word for the drink, not Spritzer or Spritz. It's just too hard to pronounce for non-German speakers.
Present in every recipe, and the reason for the name of the cocktail, is soda water. "Spritzer" means a splash of something, like in "a splash of water" - "ein Spritzer Wasser".
Many people claim that people in German-speaking areas of Europe use the term as a synonym for drinks containing soda water or carbonated lemonade. However, that's not correct. Spritzer is the English word for terms like G'Spritzer (Austrian) or Schorle, its German equivalent.
The Spritz is a combination of bubbly Prosecco, soda water, and bitter aperitifs like Campari or Aperol. The slightly bitter but refreshing mix takes the tastebuds on a fun rollercoaster.
The recipe recommends a simple 3:2:1 approach: it consists of three parts Prosecco, two parts Aperol and one part soda water.
Aperol made enormous efforts to establish their version of a perfect Aperol Spritz. It is still one of the famous versions of a Spritz. Their formula is somewhat common knowledge and a standard offer in many places.
Today, the recipes become more diverse as new and creative interpretations are constantly arising. Still, the 3:2:1 approach remains a great guide to achieving a well-balanced Spritz cocktail.
While Prosecco and soda water are indispensable, the bitter aperitif often is replaced with something else. That can be other Amari, aperitifs, liqueurs, high-percentage spirits, juices, or a mix of the above. Try, for instance, our Amaro Spritz based on two different Amaro liqueurs or this non-alcoholic Spritz for a hangover-free alternative.
In order to comprehend why this light and sparkling drink became so successful in Italy, you must understand the Italian lifestyle. Living the "dolce vita" means indulging in all the good things in life.
First and foremost, this means indulging in wine and food. That is also reflected in the many courses Italians eat for dinner, which typically start with an Aperitivo cocktail to stimulate appetite. [3]
Spritz cocktails in general are perfect for this for many reasons. First, they're light, well-balanced, and refreshing. Second, the herbal infusions in Amaro liqueurs are excellent for stimulating appetite.
Color-changing cocktails have been taking over social media by storm. Seeing a dark blue colored cocktail turning bright pink doesn't cease to fascinate people.
This Butterfly pea simple syrup is dark blue in its natural color and sweet and slightly floral in taste. It's an excellent way to sweeten and color cocktails or non-alcoholic drinks like soda water or citrus juices.
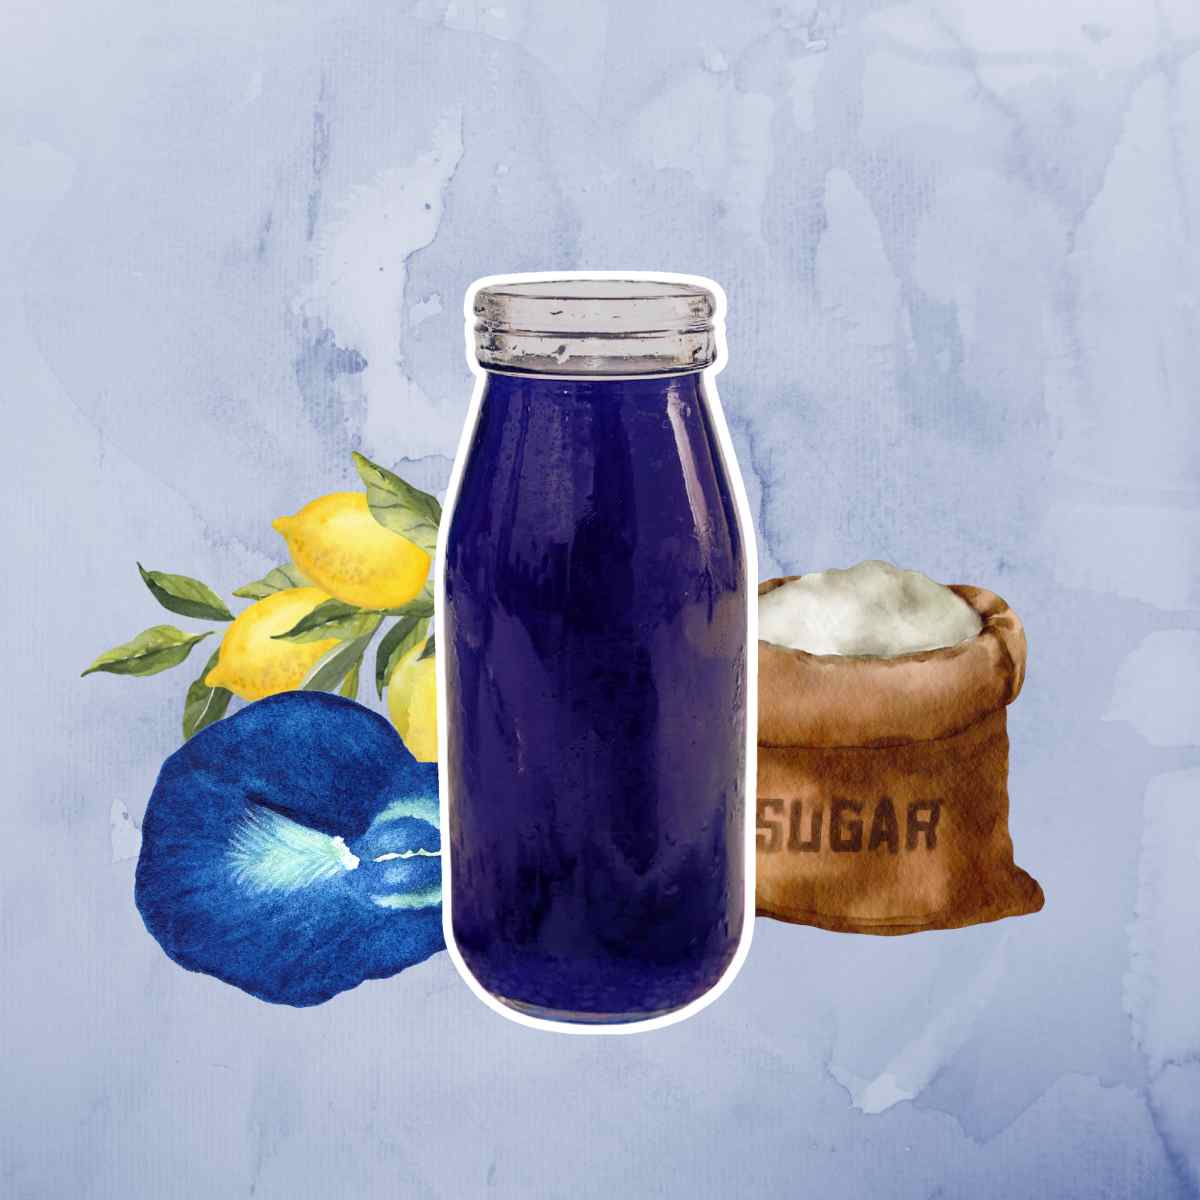
To make this colorful simple syrup, you only need two ingredients. One of them can be a little bit pricey, though:
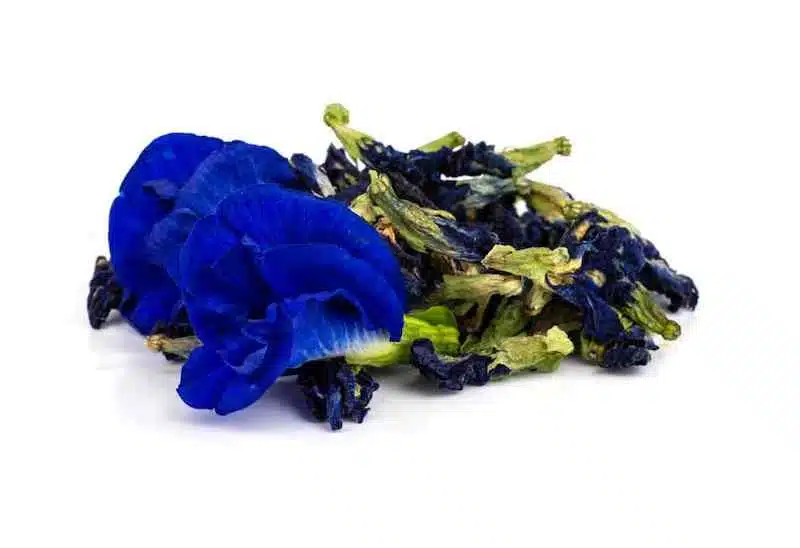
The scientifically correct name for the butterfly pea is Clitoria ternatea. Its origin is in Asia, where it is also known as Asian pigeonwings or blue peas.
Over the years, the name butterfly pea became more common as it surely is the most catchy one. In Southeast Asia, butterfly pea has been used for brewing tea and as a natural food coloring for a long time. In India, it is even considered a holy flower. Hindi often use it for offerings to an image of a god, the so-called puja rituals.
Besides being a mood enhancer, the butterfly pea flower provides several other health benefits. For instance, stress relief, lower anxiety, reduced fatigue, and raised energy levels. [1]
Due to its anti-inflammatory and pain-relieving properties, Spas and massage parlors often serve tea from the blue flower after a treatment.
Butterfly pea flower simple syrup is often used in tea or syrup. It has a very subtle yet earthy flavor with wooden notes, similar to green teas. Overall, it's relatively neutral and won't affect the taste of your drink overly much.
The color-changing effect of Butterfly pea flower syrup is caused by changing the pH. By adding acidic ingredients, like citrus juice, to cocktails, lemonade, to tea made with butterfly peas, they will change their color from dark blue to pink.
But you can also achieve other shades. Depending on the pH, the color can range from pink, violet, blue, and green to yellow. [2]
For those interested in chemistry, the blue color indicates a pH of 7. By increasing the acidic level, the color will turn to violet at pH 4, and ultimately pink at pH 1.
If you do not increase the acidity but create o more alkaline solutions, the color can turn green at pH 8 and yellow at pH 11. You won't see butterfly pea drinks in green or yellow because the necessary alkaline solutions are almost impossible to achieve with edible ingredients.

In cocktails, you can use it as an alternative to simple syrup. That won't affect the overall flavor of your drink, but it will add an interesting color effect to it.
Used in an acidic drink like a Gin Sour cocktail, it turns bright pink. If you use it to sweeten an Old Fashioned, the tint will remain dark blue to purple due to the lack of acid.
In Northern Thailand, they have a traditional recipe called Nam Dok Anchan: butterfly pea flower tea mixed with honey and (usually) a lemon on the side. [3]
Accurately measuring the ingredients of a cocktail recipe is one of the crucial tasks for bartenders when making a cocktail. For that, you need the right tool. That is when a jigger comes into action. This little measuring device helps bartenders to get the exact measurements for each ingredient of a drink. The standard jigger size is 1.5 ounces (45ml) on the larger side, and 1 oz (30ml) on the smaller side.
Besides other tools like cocktail shakers, bar spoons, and strainers, it's part of the basic equipment of any bartender at any bar - including your home bar. So let's see what there's to know about this nifty bartending tool.
What is it? | Jigger Measurements | Types of Jiggers | Why "Jigger"
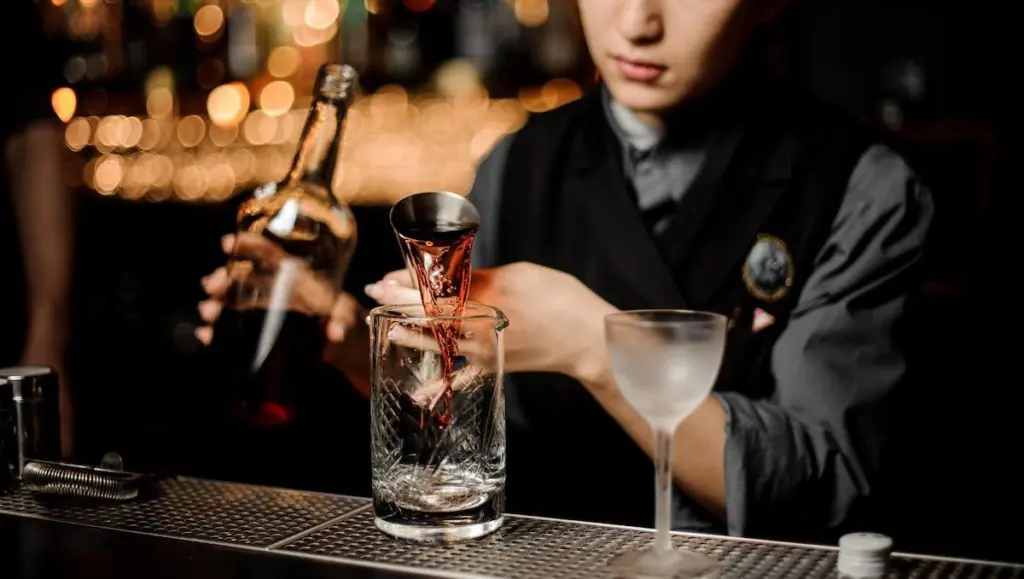
A jigger, often only called a bar jigger or cocktail jigger, is a small and usually dual-sided hourglass-shaped tool that makes it easy to measure ingredients to create cocktails quickly and consistently. They come in different sizes and designs.
This tool is used by bartenders for measuring and pouring liquid ingredients when mixing cocktails. It comes with various marks inside the measuring cups that indicate different amounts.
The capacity of each side varies between 0.5 and 2.5oz or the respective amount in ml. Sometimes the word "jigger" is also used as a measuring unit. So whenever someone asks for a jigger shot - this refers to 1.5oz of whatever liquor you're serving.
A jigger can have different sizes and measurement units. Typically the large bowl holds 1.5 to 2 ounces of liquid, and the smaller cup is usually 0.75 to 1 ounce.
While some measure in oz, others in cl or ml. Always check for that when using a new measuring tool for making a drink. Also, the overall capacity can vary. For instance, a standard Japanese-style Jigger holds 2 ounces on one side and 1 ounce on the other.
One jigger (shot) is exactly the amount of one standard shot glass - 1.5 ounces. Hence, if a recipe asks for one shot, it refers to 1.5 oz of spirit. A pony shot is a little less and translates to 1oz of liquid.
| Small cup | Large Cup | |||||||
|---|---|---|---|---|---|---|---|---|
| 1st mark | 2nd mark | 3rd mark | Overall capacity | 1st mark | 2nd mark | 3rd mark | Overall capacity | |
| Classic Jigger | 1/4 oz | 1/2 oz | - | 1 oz | 3/4 oz | 1 1/2 oz | - | 2 oz |
| Japanese Jigger | 1/2 oz | 3/4 oz | - | 1 oz | 1 1/2 oz | - | - | 2 oz |
| Bell Jigger | 1/4 oz | 1/2 oz | 3/4 oz | 1 oz | 1 oz | 1 1/4 oz | 1 1/2 oz | 2 oz |
There are jiggers for both - the so-called US fluid ounce (oz) and the imperial system (ml/cl). I usually refer to oz, yet as many recipes use cl or ml, I'll quickly show how you can convert both measures.
1 oz is slightly less than 3 cl, 29.57ml to be precise,. 10ml convert to 1cl. To make it easier, here's an overview of the most common measurements in oz and how they translate to cl and ml.
| Amount in cl | Amount in ml | |
|---|---|---|
| 0.25 oz | 0.75 cl | 7.5 ml |
| 0.5 oz | 1.5 cl | 15 ml |
| 0.75 oz | 2.25 cl | 22.5 ml |
| 1 oz | 3 cl | 30 ml |
| 1.25 oz | 3.75 cl | 37.5 ml |
| 1.5 oz | 4.5 cl | 45 ml |
| 1.75 oz | 5.25 cl | 52.5 ml |
| 2 oz | 6 cl | 60 ml |
There are different types of cocktail jiggers, from one-sided (single) to two-sided (double) and from Classic to Bell to Japanese jiggers.
Single Jigger
A single or one-sided jigger has a single bowl to fill in and measure spirits. It can look like a simple shot glass or a more advanced measuring cup with different levels. It's great for home bar use but not very common with professionals.
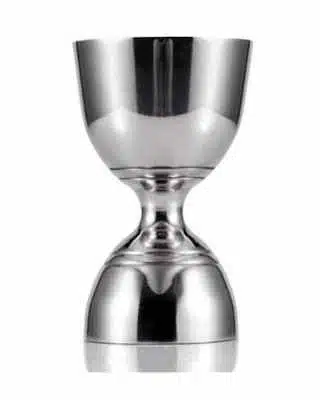
Double Jigger
A double or two-sided jigger has two bowls to measure liquids. It is shaped like an hourglass and is usually made of stainless steel. That is the kind you see in most bars. It's also the type I prefer.
The two bowls are of different sizes, for example, 1oz and 2oz. Each bowl has marks on the inside that indicate partial amounts. For instance, the 1oz bowl could have marks for 0.5 oz and 0.75 oz, while the 2 oz bowl typically has a 1.5 oz mark.
These are the most common styles:
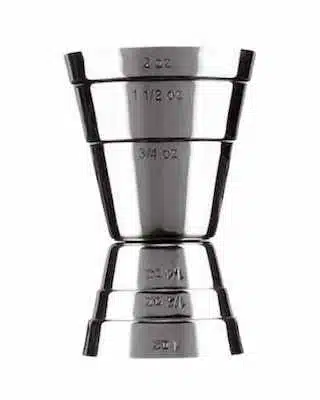
The classic jigger looks unspectacular but is functional: A double jigger with two measuring cups in different sizes. The standard size is 1.5 or 2 oz for the large part and 1oz for the smaller one.
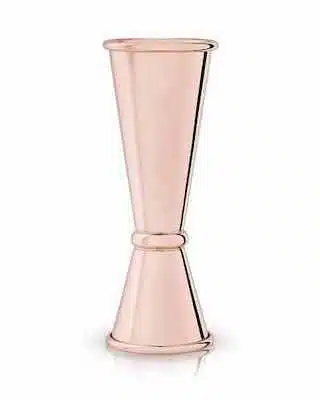
The slim design and thin diameter of Japanese jiggers make measurements more precise. Additionally, the length of this tool combined with its narrow shape makes it easier to pour the spirits into your shaker without spillage.
This one is my favorite and also the most common type you'll see in bars. Not only because of the fancy design but also due to its versatility - it (usually) comes in the practical 2oz - 1oz combination.
Another double-sided is the Bell jigger. The design is more ergonomic with its rounded curves and slim mid-section. That facilitates holding it and makes it easy to pour spirits.
It comes in different sizes, but, in most cases, the small cup holds 1 ounce and the large cup 2 ounces.
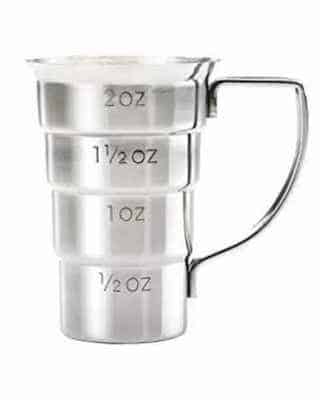
A Multi-level or stepped jigger is quite similar to a measuring cup. It's a typical single-sided but made of metal.
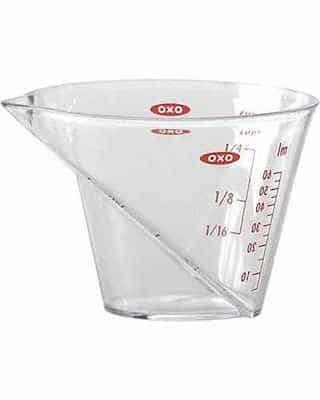
A measuring cup is a perfect tool for beginners. It's a single jigger made of clear plastic that includes most of the standard measurements shown on the outside. It has a single-basin advantage which often leads to less spillage and faster serving times.
Once you're used to measuring small amounts of liquids, I recommend switching to a bell or Japanese-style jigger. These allow for faster measuring and pouring.
There are actually several theories on how the tool got its name. In one of them, the British Navy is involved. -Again, after having invented the Gin & Tonic and Cocktails like the Navy Grog.
History says that it goes back to the sailors who named their daily ration of booze after the lowest mast on the ship, the jiggermast - probably because they felt like they rarely got enough. [1]
When digging further, I also found an Oxford English Dictionary definition. According to them, in the US Northeast in the 19th century, Irish laborers were supplied with Whiskey by a boy called the jiggar boss.
The jiggar boss was supposed to deliver "half a gill of Whiskey to every man, sixteen times a day". Half a gill is 2.5oz (of Whiskey). So every man drank 40oz of Whiskey a day. [2]
The last theory says that "jigger" is related to the word "thingamajig", meaning 'object that has no other name'. I guess it would have been too straightforward to call it a measuring cup or something similar.
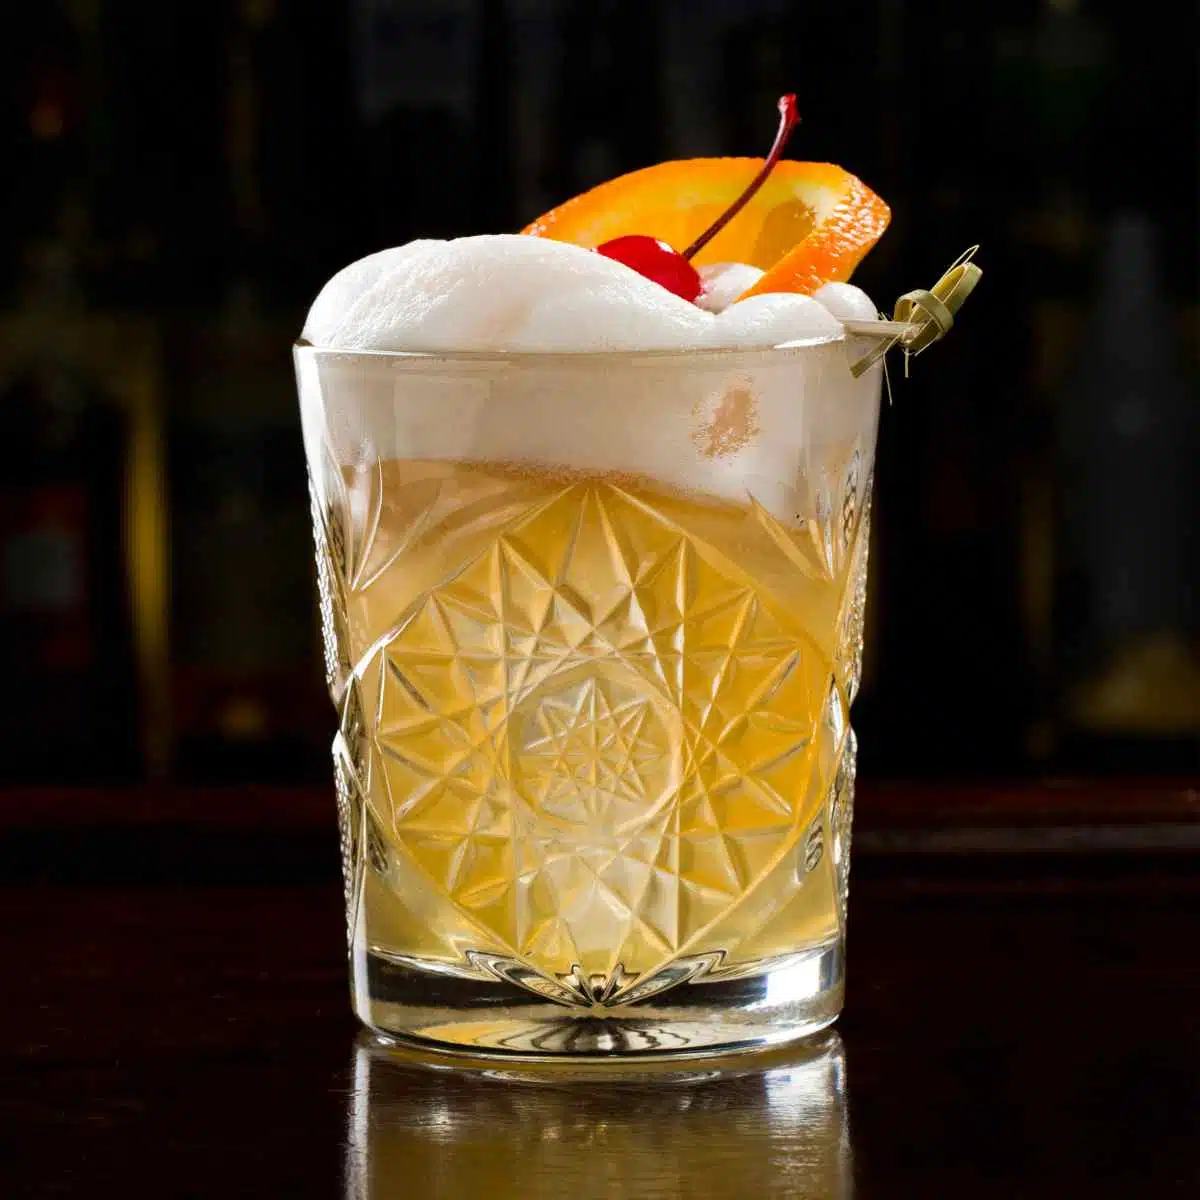
The Rum Sour Cocktail is part of the Sour family. In fact, it's one of the first members and absolutely delicious.
In saying that, the Whiskey Sour, another member of said family, might be more popular these days. Still, the first written-down sour recipes were Gin Sour and Rum Sour (aka Santa Cruz Sour).
Both recipes had been published in Jerry Thomas' The Bartender's Guide in 1856. So now let's see how to make the best Rum Sour and what goes into the drink.
A classic Rum Sour consists of Rum, fresh lime juice, and simple syrup. You will find that this is pretty close to what a Grog would be. Yet, there are some optional elements that will lift the drink to the next level.
To get that perfect egg white foam in our Rum Sour recipe, dry shake the ingredients before shaking them with ice. Here are all the steps you should follow to make this amazing Sour cocktail.
Step 1: Put all the ingredients together in a shaker without ice and shake for 10 to 15 seconds. That helps to create a strong, foamy top for your drink.
Step 2: Next, add ice into your shaker and shake again for 10 seconds.
Step 3: Strain into a chilled sour glass (without ice) or rocks glass (over fresh ice). Then add a couple of drops of Angostura bitters, and your Rum Sour is ready to be served.
Glassware always is essential in the world of mixology. Sometimes for the taste, often for the visuals, and occasionally for both.
For Sour cocktails, there have been several suggestions over the years. Starting with Jerry Thomas' recommendation to use a "small bar glass", continuing with a claret glass, punch glass, and even a highball glass.
Today, Sour cocktails usually are served in the same type of glass, an Old Fashioned glass and on the rocks. -A few drops of Angostura bitters, and your Rum Sour is perfect.
The choice of Rum is not the only way to tweak this recipe but one of the easiest. By adding or replacing elements, you can create something entirely new. Here are some excellent riffs on the Rum Sour.
As the name suggests, this Rum Sour variation is based on Rum produced in Haiti. The best Rum for this is probably Rhum Barbancourt. The Barbancourt distillery began producing their Rhum Agricole in 1862 and is still one of the best Haitian Rum producers. You can substitute the dark Rum in our recipe and keep the measurements.
Some recipes include orange juice as an additional ingredient. That is not in the original recipe and is called a Stone Sour.
Make our festive version of a Rum Sour by adding Christmas spiced syrup. The syrup is made from a dry red wine refined with typical Christmas spices like cinnamon, oranges, cloves, etc.
All credit for inventing the Rum Sour, along with the whole Sour Cocktail family, goes to the British Navy.
First, having wanted to prevent overly drunken sailors, then to improve the taste of low-quality Rum rations and later attempting to fight scurvy and malnutrition, British sailors used to mix their spirits with lime juice.
Back then, doctors believed that the acid would help the sailors prevent scurvy. But, actually, it was the high vitamin C content of the lime. -That's also why British seafarers are called Limeys, by the way.
Anyway, while sailing in the Caribbean, Rum was the spirit that was available everywhere. Together with lime juice, it became known as Navy Grog. This creation, also reminiscent of a Daiquiri, was the origin of the Rum Sour cocktail as we know it today.
All that dates back to the 1700s. So, it took more than a century before the first Rum Sour got mentioned in a book.
A cocktail strainer is an essential bar tool that's indispensable for creating delicious quality cocktails. It keeps fruit pulp, kernels, ice used for mixing, and other residues out of your drink. Regardless if you stir your drink in a mixing glass or mix it using a cocktail shaker.
When you pour your cocktail, you want to filter out anything that's not supposed to be in your drink. So let me tell you all about cocktail strainers and how to use them.
What is a Cocktail Strainer? | Different Types | Hawthorne Strainer | Julep Strainer | Fine Mesh | Built-in | How to use it | Material | What to look for? | An alternative for home use
A cocktail strainer is an essential bartending tool. It's a sieve bartenders use to pour a perfect drink. The cocktail or bar strainer filters fruit pulp, ice shards, and other particles that shouldn't be part of your cocktail while it lets all the liquid pass into the glass.
Bartenders use it after shaking or stirring your drink. This step ensures that none of the mixing or shaking ice ends up in the final cocktail.
Cocktail strainers come in different types and shapes. We'll guide you through them and help you learn how to use them properly.
You've probably seen different strainers: the classic Hawthorne Strainer is the best-known, closely followed by the Julep Strainer. Those two types have specific purposes and advantages. Thus, usually, bartenders have both. Here's a short overview:
The Hawthorne is the only cocktail-straining tool featuring a spring. This spring not only filters out ice and parts of fruits but also fits snugly on any mixing glass or shaker effortlessly. It easily adapts to different diameters and strains effectively.
Another thing you can do with this spring is to help make thick egg-white foam. Remove the spring and put it into your shaker when dry-shaking a cocktail with egg white or cream. That helps aerate the ingredients and makes them foamier.
Pros:
Cons:
Recommendations: From Entry-level to Pro, here are my favorites, most of which I have at home, too:
A Julep is a traditional tool that is still used by bartenders regularly. Cocktail books from the mid-1800s show how cocktail enthusiasts strained cocktails into a second, empty glass.
This strainer is technically just a perforated piece of metal with a handle. Usually, it doesn't sit easily on top (or inside) of a shaker or mixing glass. Hence, it requires more practice to master straining cocktails with it.
The main advantage is its robustness. A good Julep Strainer is hard to ruin and can last forever. And even if it's a bit harder to handle, I recommend adding one to your collection of bar tools.
Pros:
Cons:
Recommendations: With Julep Strainers, you can't go wrong, really. Still, here is one I would recommend buying Piña Barware Julep Strainer. This piece has a unique design and offers good quality at a reasonable price.
A fine mesh is an addition, not a replacement for other stainers. Every time you read "double-strain", it's time to unpack your mesh strainer to get that cocktail right.
Other stainers will always let some small pieces of ice or fruit through that will end up in your cocktail. In most cases, this is not a problem. But there are some recipes where you need that velvety smoothness in your drink.
Pros:
Cons:
Recommendations: Mesh strainers are usually quite affordable. There are many different versions, and not all are perfect for creating cocktails. Here are two different ones I can recommend without hesitation:
Cobbler shakers have a built-in strainer. Even though it's convenient that it's a two-in-one solution and will keep out big pieces of ice, I don't recommend relying on that alone. Most of them allow too much residue to end up in your cocktail.
To prevent that, use a meshed strainer to keep the unwanted fruit and kernels out of your delicious cocktails.
Pros:
Cons:
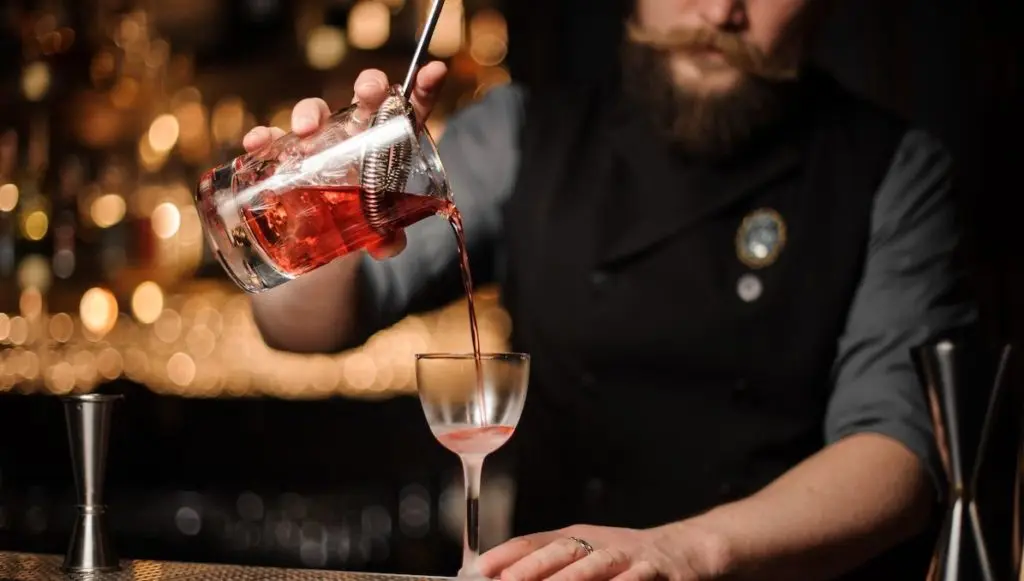
After shaking, you can put the Hawthorne Strainer on top of your shaker tin or mixing glass so that the metal tabs sit on the mixing vessel and the spring fits inside.
For a double strain, you hold a finely meshed strainer between the glass and the cocktail you strain through the Hawthorne Strainer.
A Julep Strainer is rarely used for a double strain. The standard use case is pouring stirred drinks from a mixing glass. To do that, you hold the bowl-shaped cup inside your mixing glass to prevent the ice from getting through.
The Julep Strainer will sit at an approximate 45-degree angle inside the mixing glass.
You can get strainers in various qualities and materials. Most are stainless steel, then plated with copper, gold, and other colors. Usually, they are of 304 stainless steel.
If you want something more extraordinary and sophisticated, you also can get strainers made of massive copper, silver, or brass. While those pieces are more expensive, they're often handmade and develop a beautiful patina.
When buying a bar strainer, you should choose a quality product that will help you prepare drinks. To find the perfect fit, you should pay attention to the following things.
If you want to make cocktails at home and don't have the right tools, there are some alternatives to cocktail shakers and strainers you can use to improvise. A protein shaker, travel coffee mug, or plastic bottles are all great substitutes for a real shaker in case you don't have one. Glass jars can work too but tend to crack easily.
To strain your drink, you can use a lid and arrange it so that only the liquid can flow out of your shaker. Also, with a tea strainer or a fine-mesh kitchen strainer, you can also double-strain your drink