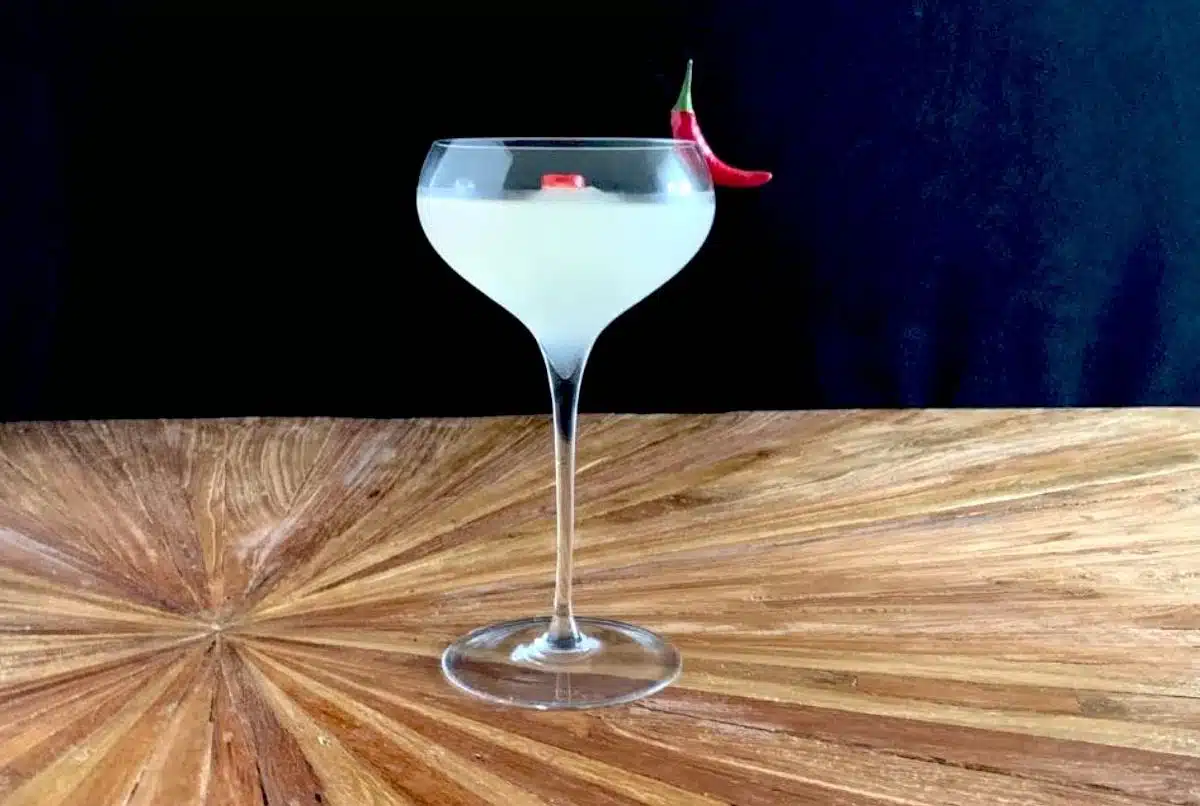
Salvatore Calabrese, one of the best bartenders of our age, created the Spicy Fifty Cocktail. When you look at the list of ingredients, you can already tell you've got a unique mix of flavors in front of you.
The Spicy Fifty's base is a vanilla-flavored vodka. It may sound like an unusual base for a classic cocktail now, but it was pretty fashionable in the 2000s.
Quick Facts Spicy Fifty Cocktail
So now, let's look at the recipe chili-spiced cocktail and how Calabrese came up with the idea for the drink.
The Spicy Fifty Cocktail is not your standard drink. Thus, you need some non-standard ingredients for it - and that's what makes it so exciting:
The drink is composed in a way that it gradually changes its flavor and perception:
At first, the sweet notes from elderflower, vanilla, and honey dominate the taste. They slowly change into zesty, citrusy notes that overlay the sweetness and bring sourness to the drink.
Finally, an intensely spicy and peppery taste takes over, nicely complementing the previous two flavor stages.
Spicy chili slices are the key to the Spicy Fifty cocktail. Salvatore describes their role as "… a highlight so that it gives an unforgettable taste and is very difficult to hide."
Salvatore Calabrese developed the recipe for his London bar called Salvatore at Fifty. The concoction was the signature drink of their first menu when the bar opened in early 2005.
"It's one of my best-selling cocktails, one of my most famous drinks, and a modern classic in its own right."
Salvatore Calabrese, in his book "Classic Cocktails."
It's no secret that Salvatore Salva Calabrese was influenced by another bartender when he came up with the recipe for the Spicy Fifty Cocktail:
In June 2004, mixologist Myles Cunliffe won third place in the UKBG (United Kingdom Bartender Guild) Cocktail Challenge. His creation from the competition goes by MyZo and has undeniable similarities.
Both cocktails use Stoli Vanilla Vodka, elderflower cordial, citrus, and chili. Plus, we know for a fact that Calabrese was aware of this cocktail: He was in the photo with Myles, handing him the £1000 cheque for winning third place.
Another source of inspiration for Salvatore Calabrese was Jean-George Vongerichten. The French Michelin star chef worked in the former restaurant Rama, located in the same building as Salvatores bar used to be, near Buckingham Palace. It was for the Asian restaurant that Salvatore created the chili-inspired menu leading to the Spicy Fifty Cocktail.
You like your drinks spicy? Then how about one of those concoctions:
You like your drink sweet and look for a drink to make use of your honey syrup, try these:
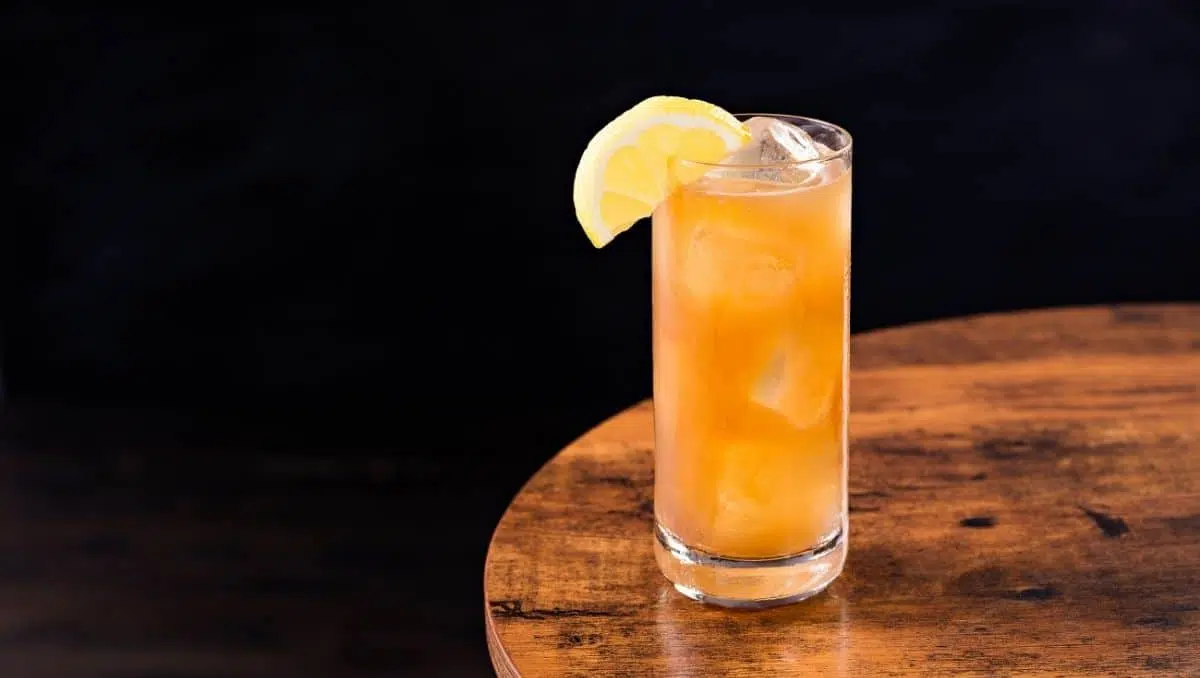
The Long Island Iced Tea, short LIT, is a classic and one of the most ordered drinks. That, however, also has its downsides in that the drink has quite a negative image because it often gets served in a not-so-classic way.
The original recipe is at least nearly as its reputation, yes. Yet, it's not as sickly sweet as the versions you can get at a college bar.
Now, time to get your shaker out and get ready to mix the best version of this misunderstood prohibition classic.
The key to making great cocktails is using great products. One of the biggest problems of overly sweet LITs is the lack of quality ingredients masked by sugar and citrus. To make an authentic, delicious Long Island Iced Tea, you'll need:
That's quite an extensive and alcohol-heavy list that turns into a dazzling cocktail when done right. If you keep these recommendations in mind and use the right ratios, your Long Island will be a delight.
Making a LIT is not very hard. The main things to consider are the same as for numerous other cocktails:
What you'll get then is a super intense cocktail that's well-balanced.
Further, the Long Island Cocktail is very easy and convenient to make as it is built in glass. All you need is a highball glass, a jigger, and a bar spoon.
The Long Island Iced Tea is a drink with countless variations. In fact, there are so many that it is hard to keep track of all of them.
Therefore, here's an overview of the most important ones (this list is not exhaustive):
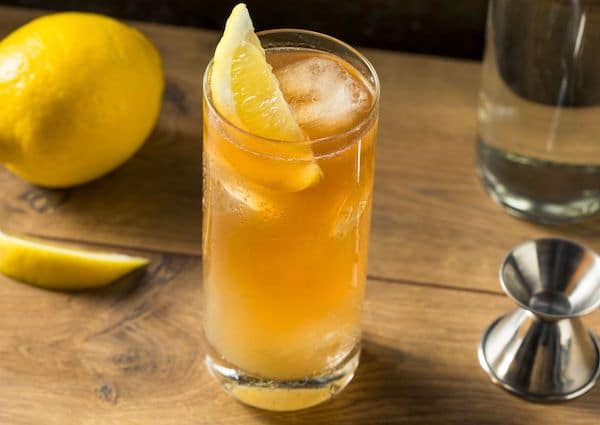
Yes, it does get you drunk quickly. However, not for the reason you might think. When you look at the average ABV of a LIT, it clocks in at around 18%. That's not low but still far from what we consider a high-proof cocktail.
For comparison, vintage classics like the Manhattan or the Old Fashioned reach a whopping 25% and more. Of course, the drink size is a lot smaller than for the Long Island.
Thus, let's look at the alcohol intake in grams per serving. It's about 24 grams for the LIT, and surprisingly enough, it's the same for a standard-sized Manhattan Cocktail. So, where does this knock-out reputation come from?
The answer is that a Long Island Iced Tea is incredibly easy to drink. You can barely taste the alcohol and usually drink this cocktail way too fast.
Now, one more thing: if you believe that sugar speeds up the process as well, you're mistaken. Sugar actually slows down the absorption of alcohol into the bloodstream.
Even though LIIT seems to be the correct abbreviation at first, LIT is way more common.
First, it's about ease of use and pronunciation. Second, "Long Island" is technically one noun. Considering this, shortening it to LIT is not only easier to say, but also accurate.
The origin of the Long Island Iced Tea most likely lies in Kingsport, Tennessee. A guy named Charlie Old Man Bishop made the first version of what we know today as Long Island Iced Tea.
Living in his community named "Long Island" in Kingsport, he created this boozy cocktail during prohibition. The cocktail was supposed to look like a regular serve of Iced Tea and not like a boozy afternoon drink, hence the name.
Later, the recipe was refined by his son Ransom Bishop. The result was a mix of Whiskey, maple syrup, and five other liquors of different quantities.
Here's Ransom's formula to give you an idea of what the original version looked like:
Over time the recipe continued to change until we got today's well-balanced version of the Long Island Iced Tea, nearly as potent as in the traditional cocktail.
Here's also a clip of the grand daughter of Charlie Bishop, talking about his famous prohibition creation:
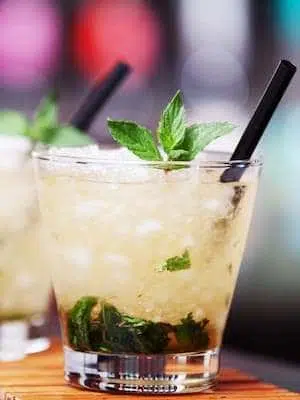
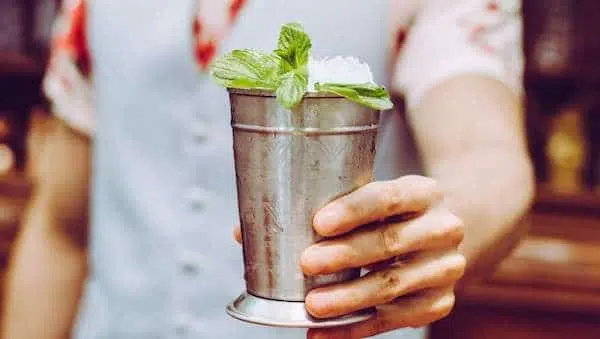
The Kentucky Derby and the Mint Julep are tied closely together. But the minty, refreshing, slightly sweet Bourbon drink is far too good to only enjoy it only on a couple of days each year.
Notably, the Mint julep is one of the few drinks that essentially need crushed ice, whereas most cocktails require ices cubes. But in this case, other versions of ice won't have the desired effect because they behave differently regarding cooling and diluting your drink.
So let's take a look at how the drink became famous and how to make a perfect Mint Julep at home.
The Mint Julep cocktail only has a few ingredients: Bourbon, min, sugar, and water. Nonetheless, there are some things you have to pay attention to. The first one is to choose the right Bourbon.
As the drink contains what feels like a ton of crushed ice, you'll need a nice and high-proof Bourbon. One that stands up against the enormous amounts of ice and won't get diluted. Crushed ice will melt a lot faster than bigger chunks of ice do.
Some recipes state that mid-80 to 90 proof is enough but I don't find that ideal. Also, after consulting a couple of Kentucky Bartenders, it seems the locals share my opinion - thus, choosing a Bourbon of 100 proof or more is recommendable.
Mint is the other main component of a Mint Julep. And to get the best mint flavor out of it, you have to treat it correctly. You may know that slapping mint is imperative to release the oils and create that intense minty aroma.
One thing to keep in mind: if you over-muddle your mint, it will taste bitter and not pleasant at all. So muddle slowly and gently. Light treatment is better than overdoing it.
The second thing you might not know about mint is that most of its aromatic oils are in the stem, not the leaves. Therefore, keeping the sprig of mint will not only look better it is also necessary to make a perfect Mint Julep.
The term julep actually derives from the Spanish word "julepe" which means rosewater. Initially, it referred to a vehicle used to mask the bitter taste of medicine, for settling stomach aches, and such.
Consequently, the term "julep" is associated with a sweet drink.
The American Mint Julep, however, was created in the 18th century. The earliest mention is from 1770, printed in the Williamsburg Virginia Gazette. In the book Travels of four years and a half in the United States of America during 1798, 1799, 1800, 1801, and 1802 by the Brit John Davis, the Julep is described as "a dram of spirituous liquor that has mint steeped in it, taken by Virginians of a morning."
But all these early mentions and signs of popularity are nothing compared to what the Kentucky Derby did for the drink. Since 1938 Churchill Downs -the horse racing complex where the Derby takes place- has been promoting the Mint Julep during the Kentucky Derby. And each year, they served more than 120,000 drinks in special collectible cups.
Ever since then, everybody associates the Mint Julep closely with the prestigious horse race, and it has gained nationwide popularity.
Here's another interesting fact: the original spirit in a Julep was most likely Cognac, not Whiskey. But due to the phylloxera epidemic in France, Cognac couldn't be exported for a while, and therefore was replaced by Bourbon. Something very similar happened to the Sazerac cocktail.
The Mint Julep traditionally is served in a Julep cup. This iconic vessel instantly revealed the kind of drink one receives. These Mint Julep cups are produced in Kentucky and come into use when serving the drink at the Kentucky Derby.
Older than the Kentucky Derby itself, the Mint Julep cup is a handmade cup crafted of sterling silver from the early 1800s. The iconic and sleek design is accredited to early silversmiths Asa Blanchard of Lexington and William & Archibald Cooper of Louisville. There are two typical styles of these cups. One type has a beaded rim, the other sports a banded rim.

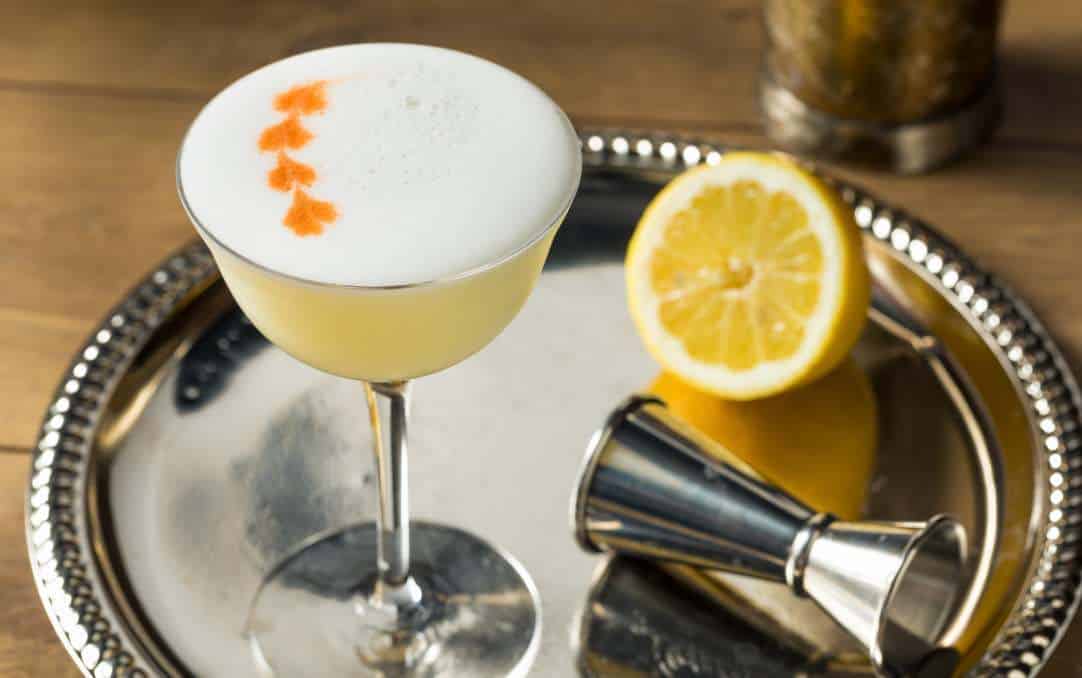
The Pisco Sour is a classic Sour cocktail with a long history. It is made following the classic combination of spirit, fresh citrus juice, simple syrup, and egg white.
Like with Pisco, the debate about whether this drink has roots in Peru or Chile has been going on for years with no conclusive answer as of yet. But regardless of its origin, the Pisco Sour is one delicious drink.
The recipe follows the basic template of all our favorite Sour Cocktails but adds two extra elements. The ingredients you need for the original Pisco Sour recipe are:
The process for making this drink is: Dry shake first, shake again with ice, garnish with three drops of Angostura bitters, serve, and enjoy.
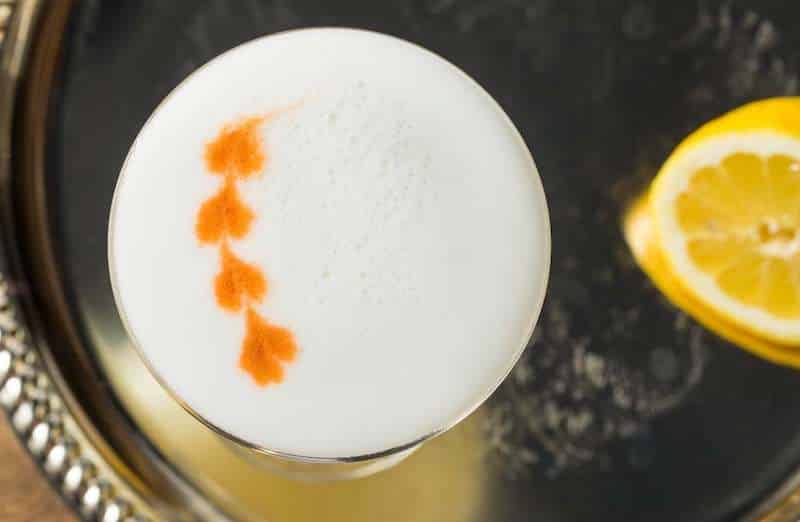
It's imperative that you get the foam right. That gives the drink its characteristic silky texture and holds the bitters in place beautifully, hence the dry shake. So let's look at this more closely:
Dry shaking means, you first shake all ingredients vigorously without ice for about 20 seconds to create a nice and firm foam. Then you open the shaker, add ice cubes and shake again.
You can also reverse the process, which potentially leads to an even thicker foam. That's especially helpful if you have trouble getting this part right.
Make sure to press the shaker cups together while shaking dry because the seal is not as tight without it. Should you, in turn, have difficulties separating the tins when shaking with ice, find help here.
Strain the contents with the help of a Hawthorne Strainer into a chilled Sour glass (without ice) or into an Old Fashioned glass (over ice). The latter is larger, hence leaving enough room for ice cubes.
Finally, when garnishing your drink with three drops of Angostura bitters, use a toothpick or a cocktail pick to twirl them or turn them into a heart shape. You do that by dragging the foam with the help of the pick right through the middle of each drop.
Even if it may sound unconventional, many Peruvian bartenders blend this drink. And indeed, that delivers great results.
If you fancy trying this at home, consider adding slightly more sugar (0.75oz instead of 0.5oz) than you would for a shaken recipe. When blended, the Pisco Sour will taste much rounder and works well with a bit more sweetness.
Outside of Peru, the Pisco Sour is almost always shaken, though. That's also the version I prefer.
For most cocktails, the question is who, as in which person, invented the recipe. In the case of the Pisco Sour, it's more elementary. Peru and Chile fight passionately about who brought forth this delicious drink.
Currently, evidence points toward Peru, but nothing could be proven so far, and new stories, findings, and theories keep coming up every once in a while.
If you managed to get a decent bottle of Pisco, here are some recipes to get the most out of it:
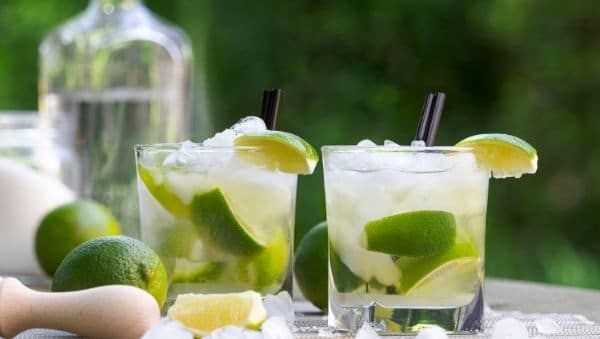
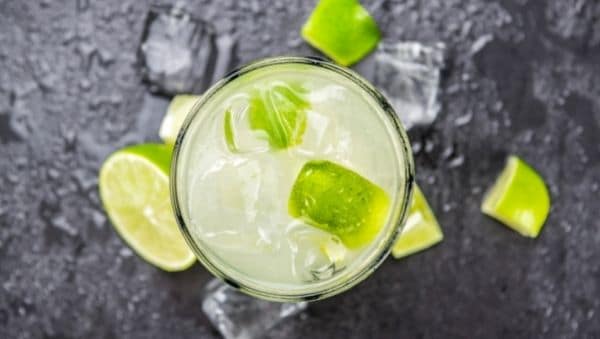
If you've ever been to Brazil, it's highly likely you had at least one Caipirinha. The cocktail is served everywhere, at any time. From the beaches of Rio de Janeiro to fine dining Restaurants in Recife. For breakfast, lunch, or dinner. Caipirinha is all over the country.
The cocktail is made of Brazilian Cachaça, granulated sugar, and fresh limes. Prepared the right way, it is an absolutely sensational drink.
It's so light and refreshing that it's so easy to find yourself having more than just a drink or two while hanging out at one of Brazil's beautiful beaches.
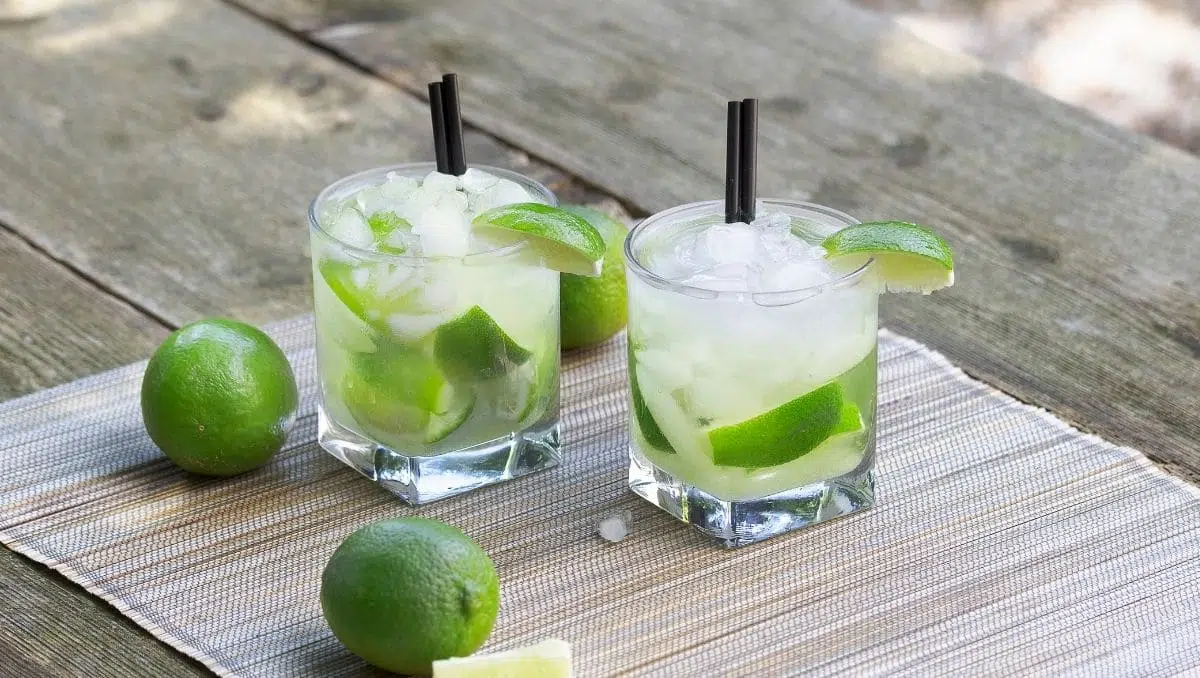
Getting a decent Caipirinha outside of Brazil is a different story, though. Even though the recipe is quite simple, in the end, it is all about these little tricks and twists that make the drink perfect.
Once you understand how the process works and what ingredients to use, you can lift your Caipi from good to fantastic. All it takes is some attention to detail in preparation.
The list of ingredients to make a great Caipi is short and sweet. Fresh limes, Cachaça, and granulated sugar are all you need. And plenty of ice, of course.
While fresh limes and sugar are part of many drink recipes, Cachaça only appears in a few popular cocktail recipes.
Cachaça is a unique spirit exclusive to Brazil. In its standard form, it's a clear spirit made of fermented sugar cane juice. Aguardiente de Cana is also pretty similar and made from sugarcane juice only.
In comparison, Rum is also made from sugarcane. But its production requires additional juices and natural molasses.
Mostly, you will come across clear Cachaça, but there are also aged ones available. Colored by the barrels they matured in, those aged Cachaças are dark and golden.
As with other spirits, aged Cachaça is richer and more intense in flavor. However, I prefer the regular Cachaça when making a Caipirinha.
For the sweetening part, stick to granulated sugar. Don't use syrup, as it won't have the same effect.
When muddling your limes with the sugar, you don't only juice the fruits. You also release essential oils from the peel of the limes. These fragrant oils are necessary to get the taste of a Caipirinha right.
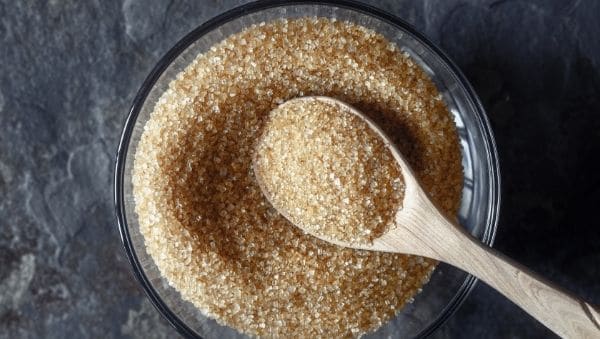
Granulated sugar helps a lot with extracting the essential oils from the lime peels -Something simple syrup can't do. My favorite choices are either brown sugar or Demarara.
It won't be a Caipirinha without fresh limes. Using fresh juice for cocktails is always vital, but it's especially important for the Caipi.
So don't even consider using store-bought lime juice. Because to get your Caipi right, you need not only the juice but also the essential oils from the limes.
For that, you cut the limes in eighth and muddle them. But that's not all. There are some extra tips for making the best Caipirinha.
To make the perfect Caipirinha, you need to understand how the drink works. There are so many restaurants and bars that manage to mess up the Brazilian gem because they miss some important details.
First the Cachaça. Although it's closely related to Aguardiente and also loosely to Rum, there's no decent replacement for it. Its crisp and fresh taste is essential to making a great Caipi. So no substitute will work here.
Another crucial part of the drink is the fresh limes. Usually, people don't pay attention and just cut them, and that's that.
But with this pro-tip from Brazil, you will master the lime cutting for Caipirinhas:
Slice them in half lengthwise, from top to bottom. Then remove the pit from the halves. You can use the limes as half, or if you want them smaller, cut them once more and use quarters or eighths.
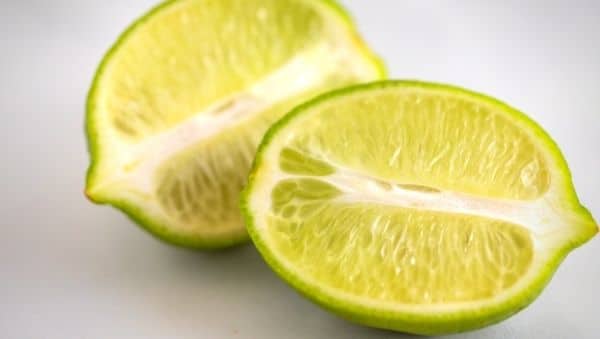
The important part is to get rid of the pit that would otherwise mix into your drink. Another way to make your Caipi extra fresh is to use some extra freshly squeezed lime juice. Not too much, though. A dash is enough.
The history of the drink is unclear. But like so often, there are a few different theories about where and when the Caipirinha got invented.
And these theories even travel across continents: Some credit Portugal and others Brazil for creating the famous drink. Here, I will sum up the most important ones behind this cocktail.
There are two versions of how the Caipirinha could have originated in Portugal.
The first story claims that the roots of the drink are in the area of Alentejo. There it supposedly was used as a medicine for the Spanish flu.
However, this medicine would have been a pretty distant cousin of today's Caipirinha, considering it contained ingredients like lemon, garlic, and honey.
The second narrative from Portugal is about a drink closer to the recipe we know today. In this theory, the Caipi's origin lies on the island of Madeira.
It is said to have evolved from the local cocktail Poncha made of Aguardiente de Cana. That is a spirit made of sugar cane and closely related to Cachaça.
Eventually, when the Portuguese needed more land to plant sugar cane, the plant and the cocktail recipe came to Brazil. And there, it supposedly changed over time into the Caipirinha of today.
And then there's a third theory which is my favorite one because it reminds me of the beginning of Navy Grog. According to historians, the Caipirinha got invented a long, long time ago.
Allegedly, in the state of São Paulo, landowning farmers regularly have mixed this local drink. Back then, the Caipi was intended to be a drink for special occasions that should reflect the sugarcane culture of the region.
They added other local ingredients to their spirit made from sugar cane to improve its taste, and that mix evolved into the Caipirinha.
Whichever story is true, ultimately, the Caipirinha became the national drink of Brazil. And from there, it began to gain popularity all over the world.
The recipe for a great Caipirinha is simple and doesn't need any extras to make it better. In saying that, there are still plenty of variations on the classic drink.
You can categorize them into variations with different base spirits and variations that add fruits to the recipe. The latter are called Caipifrutas. You can make them with strawberry, passion fruit, pineapple, kiwi, mango, and many more.
Among the variations using a different base spirit, the Caipiroska is probably the most famous one. It uses Vodka instead of Cachaça and is an excellent option if you can't get your hand on the Brazilian spirit - or perhaps don't like it.
Other variations are:
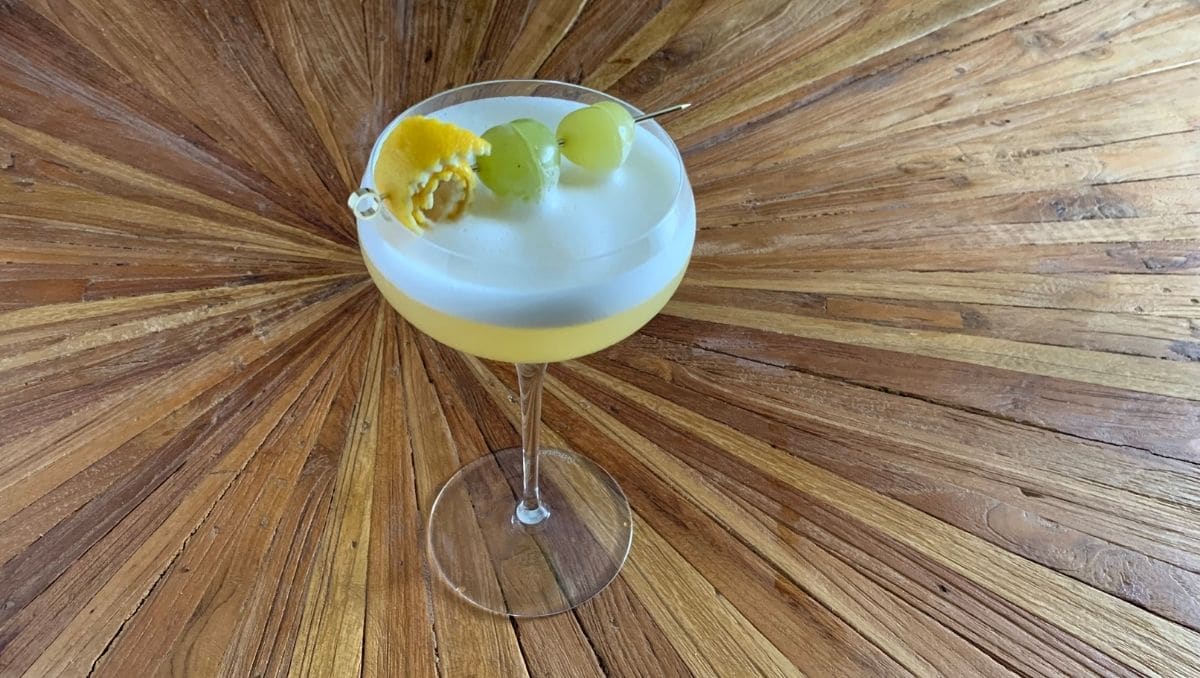
The Ve.n.to is one of the new additions to the IBA (International Bartender Association) cocktail list. And it is a truly unusual one, for it is the first-ever Grappa cocktail that made it into one of the lists of the IBA.
In case you're not familiar with Grappa, it's a clear spirit from Italy made of grapes. A product that Italians take immense pride in.
So, it's no surprise that Grappa lovers across the country are very excited about this cocktail.
Grappa is not the only unusual ingredient in the Ve.n.to cocktail. Besides that, you will find chamomile liqueur and honey mix with a chamomile base.
The problem with these two ingredients is that, for many of us, it is hard to get them at your local shops. So if you want to make the cocktail, you most likely will have to make at least one of the ingredients yourself.
The honey mix with chamomile is easy to make at home. As you might know from hot tea, honey mixed with chamomile is a real treat, and so is the chamomile-based honey syrup. It just takes equal amounts of chamomile tea and honey to create this flavored honey syrup.
The one thing you should remember is that it has to cool down before you actually can use it. So it makes sense to prepare it the day before you want to use it for the Ve.n.to. cocktail.
The chamomile liqueur is more complicated and only slightly easier to get. You might be lucky and find it online.
However, what's even more interesting about that ingredient is that the IBA recipe translates it as "chamomile cordial".
After checking with Samuele Ambrosi, he reassured me that it's really not cordial but a liqueur. The misunderstanding comes from the following:
In the original Italian recipe for the Grappa drink, that liqueur is referred to as "Cordiale alla camomilla". I guess you can see where the misunderstanding has its roots.
The Vento cocktail is an hommage to Grappa and its home country Italy. It is a beautiful blend of spirit, honey, and chamomile.
Its foundation is the traditional way of enhancing Grappa that is brought to life again with some modern twists.
Because the cocktail is brand new, there's no long history to look into. There are no old secrets, confusions, or funny stories to tell. But this also has its advantages. We know exactly who invented it, how it came to its name, and what the creators think of it.
Supervised by the current president of the IBA, Giovanni Fadda, the Ve.n.to cocktail was created by Samuele Ambrosi, head of the mixology department at GrappaRevolution, and Leonardo Varesi, Founder and bartender at Riva Bar.
The intention of the two mixologists when creating the Ve.n.to cocktail was not to establish the ultimate best way to enjoy Grappa. The goal was to showcase the spirit's versatility.
Reminded by the habits of their grandparents, Samuele and Leonardo developed a cocktail based on Grappa. Back in those days, people used to sweeten their Grappa with local herbs.
Samuele describes this concoction as "something similar to the Canchanchara or the Ti' Punch." It is a traditional mix of ingredients that they both wanted to get into the modern Ve.n.to drink.
Besides its ingredients, the name of this Grappa drink also stirs interest.
While Vento would be a perfectly acceptable name, the creators integrated two extra dots in between.
Vento in Italian means wind. "Something you can't touch, but that can unite all lands", Samuele describes the meaning of the cocktail.
The dots in the name emphasize the origin of the Grappa. They unite two of the most famous Grappa regions in one word.
Ve stands for Venezia, or Venice, as you probably know it. It's the capital of the Veneto region. And this already explains the second part of the cocktail's name: the "Ve" plus the n refer to Veneto.
And the last syllable, the to, stands for Trentino Alto Adige.
Now to the main ingredient of the cocktail. Grappa is an exciting and unique spirit from Italy. A traditional digestif or post-dinner drink.
And, as a matter of fact, it is a spirit made of leftovers from wine-making. You might wonder how this can be. After all, Grappa is not known to be one of the cheaper spirits. So let's have a closer look at this and find out.
When making wine, the grapes are pressed thoroughly to get as much liquid out of them as possible. And what's then left in the press is called pomace.
Pomace is the name for the solid remains of the grapes and can't be used to make wine. It includes stems, seeds, and stalks. The purpose of Grappa is to capture the essence of these leftover grape bits. And the result of this is a beautiful and intense spirit. Grappa is also more on the heavy side, usually ranging between 36% to 60% ABV.
This traditional process is a perfect example of how not to waste ingredients. -A role model for the zero-waste movement.
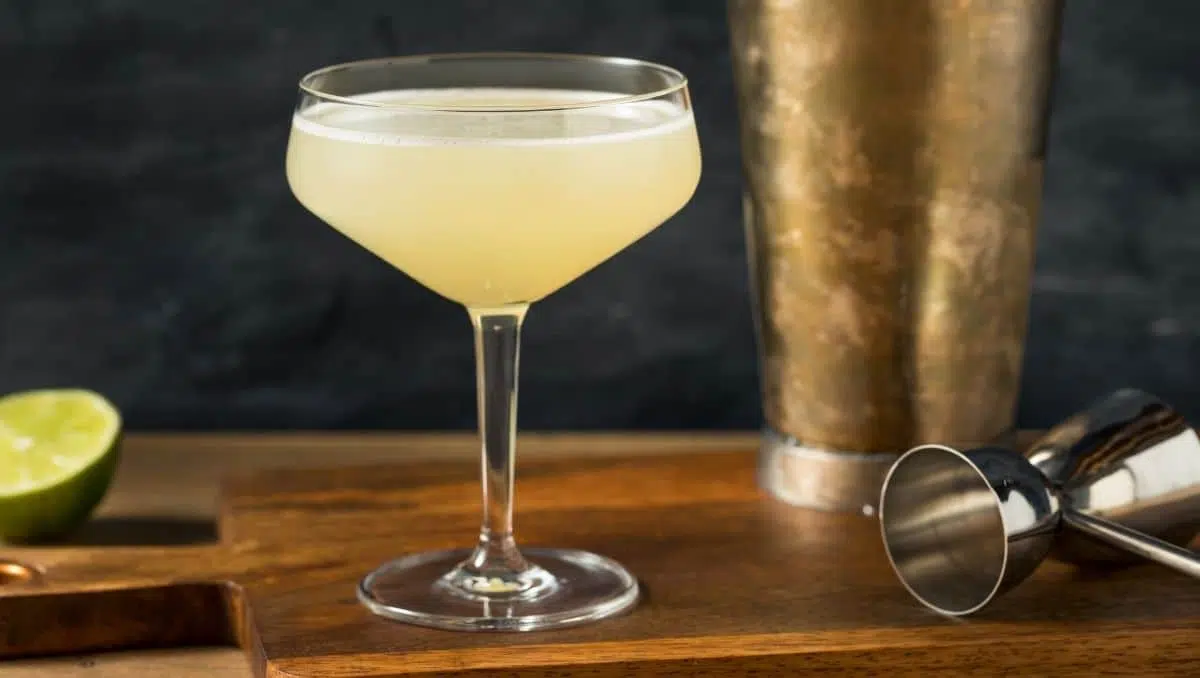
The recipe of the Between the Sheets might not be quite as famous as its forerunner, the Sidecar, but nevertheless is considered a cocktail classic in its own right. This drink is bright, tangy, boozy, and definitely worth a try.
In the classic Sidecar recipe, cognac is the base of the drink. For the Between the Sheets, a split base of cognac and rum adds more complexity.

The split base of cognac and light rum makes the cocktail more complex. The rich flavors and aroma of aged cognac blended with the fresh, crisp, and tropical taste of white rum create a distinct flavor profile for the base of this cocktail. To get a decent base, invest in quality cognac and rum.
Mixing a great Between the Sheets is pretty straightforward, but there are still a few things to keep in mind:
Since this cocktail is not served over ice, it's vital that all components are chilled. That also includes the glassware. Either put it in a freezer for a few minutes before serving or cool it down with ice cubes while mixing the drink. Remove the ice and the melted water before pouring.
Further, shake your drink for at least 10 seconds. If you can, make it 15 seconds to cool the ingredients even more and to get the right amount of dilution from the ice. With a cocktail so heavy on the booze, you need that bit of water to get the balance right.
The measurements of the Between the Sheets in our recipe are close to the traditional take on the cocktail. The original recipe requests a full ounce of each rum, cognac, and Cointreau. Combined with just a bit of lemon juice, the resulting drink is quite potent.
In our recipe, we slightly increased the amount of lemon juice to create a better balance between the elements without changing the character of the drink.
If this is still too strong for you, consider reducing the alcoholic components to 3/4 oz each and mix it with 2/3 oz lemon juice. If that's still too strong, use a triple sec with 20% ABV instead of Cointreau.
There's not much known about the history of the cocktail, but I want to share the few things I found out:
Invented by Harry MacElhone, the Between the Sheets is a descendant of the traditional Sidecar recipe. MacElhone is a famous bartender credited with numerous other creations like
Most likely, the Between the Sheets was created in his famous "Harry's New York Bar" in Paris, France. The exact time of its first appearance there is unsure, but it's widely believed it was during prohibition. Most likely between the late 1920s and the early 1930s.
Unlike the traditional Sidecar, his new creation is a split-based cocktail. It seems probable that this change reflects in the name of the cocktail -something that is in between. At least that makes for a pretty nice explanation for why the drink got its name.
The Illegal cocktail is a new addition to the list of IBA standardized cocktails. A boozy mix of Mezcal, Rum, Maraschino liqueur, and a few more ingredients.
It's a unique combination of bold flavors that brings sunshine to your mind, even on rainy days. This drink immediately transports you to Mexico, the home of Mezcal.
So let's find out how you can bring those exotic vibes of the Illegal cocktail to your home.
As some might already know, I like to add a few historical facts - or at least assumptions. I believe this brings a bit of context to the recipe and makes it easier to grasp the drinks.
The Illegal cocktail, however, seems to have been flying entirely under the radar. When I first heard about it, I was surprised to learn that there hardly is any information available about it.
The only interesting fact I could find is that the Illegal cocktail traditionally is served in clay mugs. -Just like the clay vessels commonly used to drink Pox, an ancient Mayan spirit, and other Latin American drinks like the Canchánchara or the Cantarito. All of them usually are served in those traditional mugs.
But as hazy as the history of the Illegal drink is, the ingredients and the preparation method are widely available. So let's talk about what you need to create this Mezcal cocktail.
This cocktail celebrates summer, sunshine, and beaches. It's boozy, smoky, tart, and refreshing. And the list of ingredients is quite long when compared to other drinks.
So I think it's best to start with the base of the Illegal cocktail, Mezcal.
Mezcal is an agave-based Mexican spirit. Besides the typical taste of agave, it usually has a strong smoky flavor. Apart from Tequila, it's the most important spirits export from Mexico.
And although Tequila is technically also a Mezcal, there are some differences in what defines both spirits. If you're interested in that, read about the differences between Mezcal and Tequila.
If you're new to Mezcal and unsure about the smokiness and which one to buy, here's a list of our Mezcal recommendations.
Yet, Mezcal is not the only high-proof alcoholic ingredient. White Jamaican Rum is also part of the recipe.
White Rums are typically relatively clean, fresh, and crisp. Therefore, this adds a touch of freshness and some fruity notes to the drink.
The Illegal Cocktail calls for an over-proof Rum, meaning it should have more than 100 proof - that equals 50% ABV.
Maraschino liqueur is an Itialian high-proof liqueur made from the Marasca cherries. Apart from a cherry aroma, you can taste almonds, especially when you try this liqueur neat.
Overall, Maraschino liqueur it's quite dry and bitter and far less sugary than you might expect from a cherry liqueur.
The Illegal gets its sweetness from two different ingredients: Falernum and simple syrup. The latter is regular sugar syrup.
Falernum, in turn, is pretty popular in Tiki cocktail culture and features a long list of spices and fruity ingredients. If you want to make your own, here's a recipe for homemade Falernum.
Freshly squeezed lime juice balances these sweet components and helps to bring all the different flavors together.
As always, when making high-quality cocktails, the lime juice should be freshly squeezed. The slightly artificial acidity of pre-bottled citrus juices is will always shine through in your drinks.
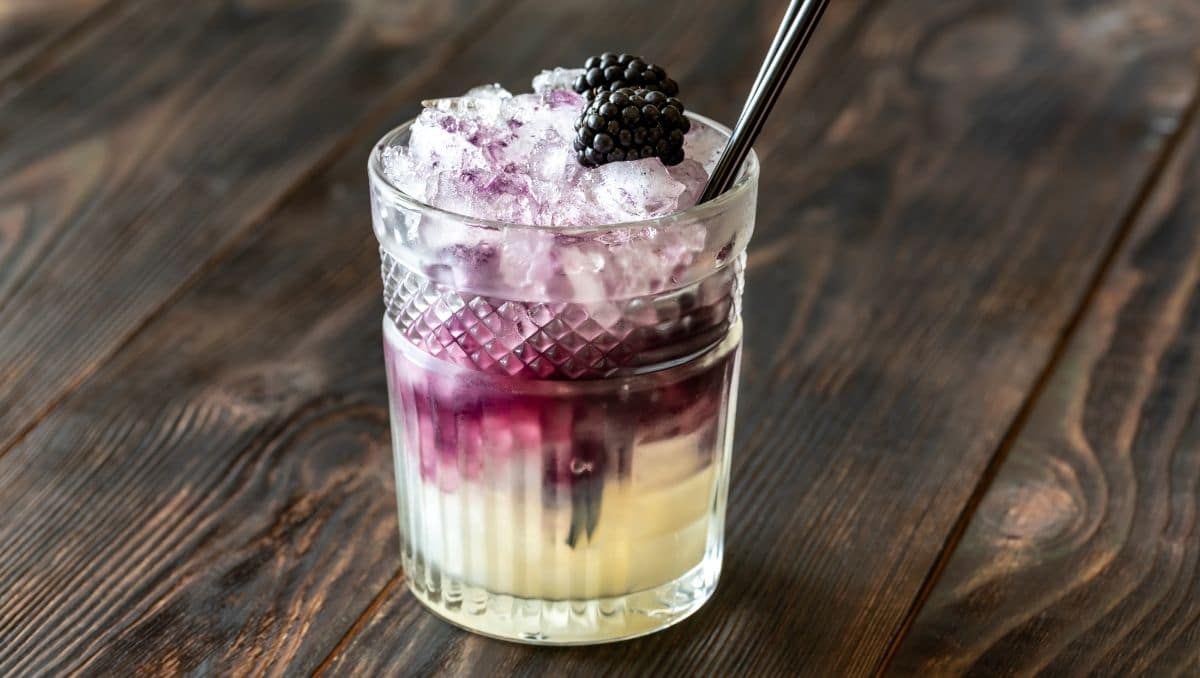
When looking at the Bramble Cocktail, it seems like one of the early-age cocktail recipes. The blackberry-flavored drink is restrained, with a limited amount of ingredients, and tastewise right on point.
The name "Bramble" also does sound like one of the vintage cocktails. However, the recipe really is a creation of the 1980s.
The Bramble recipe calls for four ingredients. Mainly, it is about picking a suitable type of gin, squeezing fresh lemon juice, and getting a quality Crème de Mûre:
Making a great Bramble Cocktail isn't too difficult. Still, there are a few things to consider before you start mixing:
The best option regarding the glassware is an Old Fashioned glass or a Tumbler. Their designs keep the contents chilled longer than, for instance, a coupe glass would. And that's what you want for a cocktail recipe that calls for crushed ice.
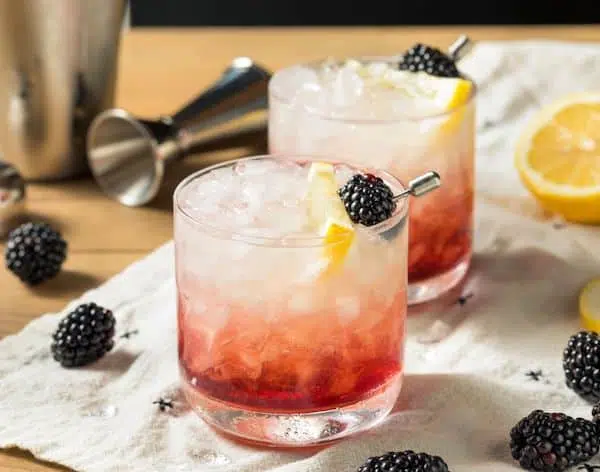
One of the most popular variations is to bring in fresh blackberries. Not only as a garnish, but you replace the Crème de Mûre with fresh berries and a dash of simple syrup.
Another way to alter the recipe is to opt for another base spirit. Try pisco or Rhum Agricole and keep the measurements from the recipe above - 2oz (60ml).
If you prefer to keep the gin in the cocktail but want to make it more refreshing, you can also make a Bramble Fizz. The basic way for that would be to add soda water. Should you feel a little fancy, you can take this fizz to the next level. Use champagne instead of soda water for a Royal Bramble.
British bartender Dick Bradsell invented the Bramble Cocktail during his time at Fred's Club in London. He created the recipe in 1984 when he experimented with a new blackberry liqueur the bar had received shortly before that went under the name Crème de Mûre.
The result was nothing short of extraordinary. With only a few ingredients, he produced something that was similar to a blend of a traditional Gin Sour and a Singapore Sling. It was a perfect balance between sweet, sour, and fruity flavors.
The recipe Bradsell created for the Bramble is simple yet elegant. It is easy to make and delicious.
By the way, the Bramble isn't his only famous creation. He also invented the world-famous Espresso Martini. With his creative approach to cocktails, he revived London's bar scene and got credit for why coffee liqueurs like Kahlúa are so successful today.
The term Bramble in old American English refers to "a thorny" shrub. In the UK, it's a common synonym for blackberries.
When Bradsell was sent this new blackberry liqueur - the Crème de Mûre - he was instantly hooked on the taste. It reminded him of the brambles he ate as a child. Hence, he decided to go with this self-explanatory name. That's how the "Bramble Cocktail" got its name.
Barrel-aging cocktails is becoming more and more of a common practice in bars around the globe. Just like wine, beer, or spirits, cocktails can benefit from aging. And the best about it is that you can easily do barrel-aged drinks at home.
Continue reading to learn where the idea of barrel-aging came from, what happens while your cocktail ages, and how you can make your own barrel-aged cocktails at home.
Barrel-aging quite literally uses wood and time to change the flavor of a cocktail by letting it mature.
Usually, making a cocktail doesn't take more than a few minutes. You prep your ingredients, put them together, shake or stir them for a short while, put some garnish on, and you're good to go.
With barrel-aging, you extend that process from just a few minutes to a period of up to a few months.
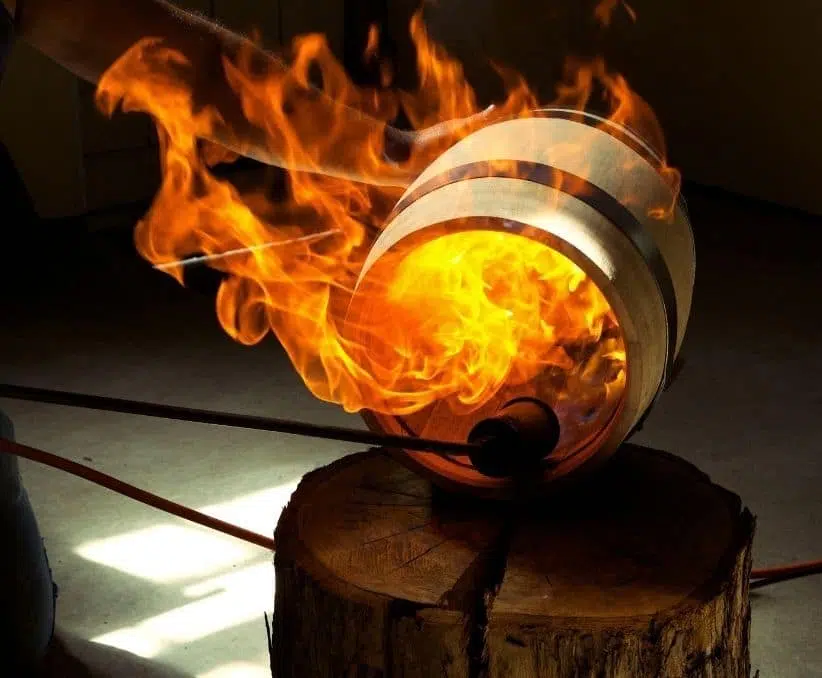
For that, you prepare your cocktail just like you always do, but instead of pouring it into a glass, you fill it into a small wooden barrel and let it sit.
That allows the elements to blend even better, and the liquid absorbs some beautiful aromas from the barrel.
The idea of aging cocktails originated in the late 19th century when bartenders filled their pre-mixed drinks in glass bottles to store and sell them.
A little later, around 1910, the American Company Hueblein Inc. published an ad where they promoted pre-mixed and wood-aged cocktails.
This ad is the first written proof of the practice of barrel-aging cocktails. But apparently, it wasn't a huge success, and the concept got neglected for almost a century.
In early 2000, aging cocktails celebrated a revival when London bartender Toni Conigliaro from 69 Colebrooke Row Bar picked up this old trend.
In 2004, he tried to barrel-age a series of classic cocktails. Long story short, the results were disappointing, and he considered the whole experiment a failure.
By then, Conigliaro was not aware that the idea had been existing already since the Victorian era. But that changed a little later when, by chance, he came across just that ad for pre-mixed, wood-aged cocktails from Hueblein.
Having had barrel-aging written off already, the ad inspired Toni Conigliaro to give bottle-aging a shot. And a few years later, after another failed attempt, this became a huge success.
When the American bartender Jeffrey Morgenthaler picked up the idea of aging cocktails during a visit to London 69 Colebrooke Row Bar in 2009, it gained full traction.
Morgenthaler decided to try the barrel-aging again, and for him, it worked beautifully. And that also marked the starting point of the new victory march of barrel-aged cocktails.
When Toni Conigliaro tried his glass-aged cocktails after a few years, he realized a significant change in the taste. But he wanted proof and had his aged drinks analyzed in a gas chromatograph.
And indeed, the chemicals in the alcohol had reacted and broken down one another. That eventually led to an incredible smoothness of the drink as a whole.
When barrel-aging, the wood of the cask has an additional impact on the taste. So the chemical reactions are still happening, but they include another factor, the absorption of the flavors from the wood.
The process responsible for this is called maturation and consists of three steps: Extraction, Subtraction, and Oxygenation.
So when cocktails age in barrels, the maturing process often leads to surprising new aromas. It also adds more depth of flavor, almost as if the different ingredients get more used to each other over time.
Like it does for other spirits, harsher notes get smoothed out, and the drink becomes more cohesive. The barrel also adds extra flavor, depending on the type of wood and other factors I explain a little further down.
During the whole barrel-aging process, you will lose about 10% on average of your contents to evaporation. -Depending on how long you leave your cocktail in the barrel, of course.
Some of it goes into the surrounding air. And some of the liquid is soaked up by the barrel and stays with it forever.
Both these things occur no matter how high quality your cask is and how well you seal it. And it is a good thing that it does.
It is part of the magic that happens during aging. But you need to factor in this so-called Angel's Share when planning your batch.
Generally, the best choice for barrel-aging definitely is spirit-forward cocktails. The base spirit you use should be a minimum of 100 proof - or at least not much, to avoid your cocktail becoming too sweet during the process.
The combined alcohol level of the drink should neither be too low nor overly high. Somewhere between 20% to 30% in ABV is ideal, but a little higher percentage usually works, as well.
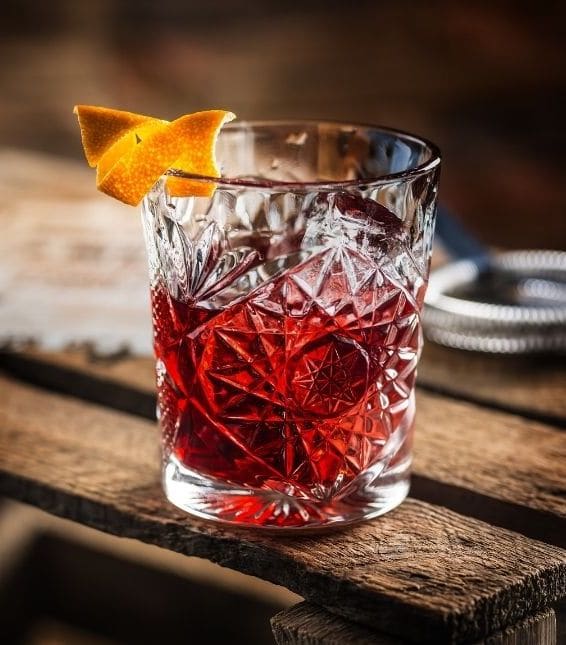
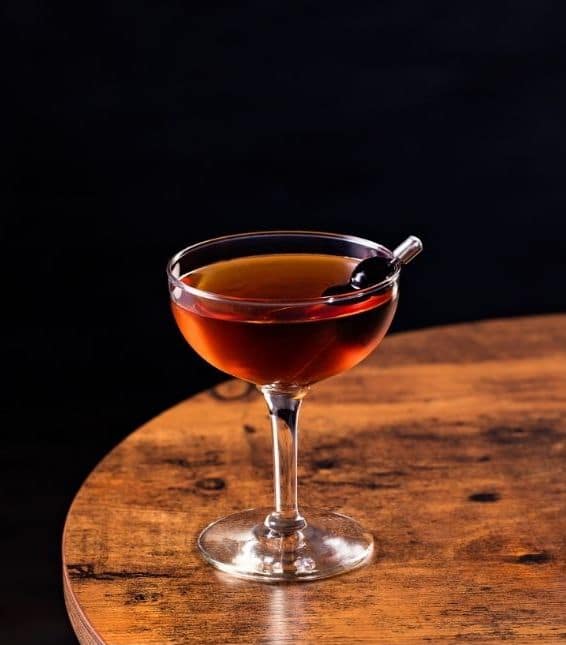
The Negroni is an excellent choice for making your first experience with barrel-aging cocktails. Also, classics like the Manhattan, the Old Fashioned, or the Boulevardier are popular and very suitable options.
With these easy-to-make cocktails, you also have the advantage of simple batching calculations.
If a recipe includes fresh ingredients, like juices or dairy, that usually have a short shelf life, they need to be replaced or left off until the time of serving.
Don't add them to the mix going into the barrel, as they will spoil the whole drink and most likely kill the cask, too.
Lemon juice, for instance, can be substituted with lemon zest, or some also use Lactart - a product made from lactic acid, to get citrus notes or sourness into your drink.
If your recipe asks for egg white, prepare the smooth foam when the cocktail has aged enough, and you can serve it to your friends or guests. - Or enjoy it yourself.
You don't need a lot of fancy bar equipment and tools to make your own barrel-aged cocktails.
But some things come in handy when you want to achieve a great result and also make life a little easier for yourself:
The perfect aging time depends on a few factors like the size of your barrel, if it has been used previously for aging or if it's brand new.
Further, it depends on the cocktail recipe you choose and your personal preferences, as well.
Generally, you can presume that the smaller the volume of your barrel, the shorter the aging time usually should be. A standard guideline would be:
20 days for a 1-liter barrel, up to 30 days for 2 liters, up to 40 days for 3 liters, and up to 60 days for a 5-liter barrel.
These guidelines are, however, only valid for the first batch you're doing in a barrel. If the barrel has been used before, the aging time for the second badge will be considerably longer. Somewhere between double or triple the time of what the first batch took.
And if you do a third batch, this will take even longer. I'll explain the reason for this further down.
Your choice of cocktail also will have an influence. Different spirits and ingredients react differently during the aging process. And the same goes for the cask.
Depending on the wood it is made of, it will develop different notes and aromas that impact the result.
With so many variables, it is imperative that you regularly test your cocktail during the aging process. For your first batch, weekly should be fine.
Also, putting aside a control cocktail when filling your barrel is a great way to determine the progress. You can compare both and tell exactly how much your cocktail changed. And that helps a great deal when you need to make your final decision.
You probably can guess it by now: you absolutely can use your barrel more than once. However, the wood will already have absorbed some from your cocktail from the first batch.
That means the aging process of your second batch will be approximately twice or three times that of the first. And the third batch might even take up to a year.
Generally, it is not recommendable to use your barrel more than three times. The wood won't have much of its initial aromas and properties left after that.
And ideally, you always stick to the same cocktail. The barrel will always carry hints and aromas of whatever you aged in it before. The pores of the wood have an uncompromising memory.
So no matter how well you clean and prepare your barrel, you won't be able to completely erase the traces of what's been in there before.
It doesn't necessarily ruin your cocktail if you decide on double-dipping. But because barrel-aging takes quite some time, I'd say, better safe than sorry.
There are a whole lot of options you can choose from. They have different sizes, wood quality, previously used, or all-new barrels.
Size
If you are new to barrel-aging cocktails, you should not go for a cask with more than 3 liters for your first try. Spirits are not cheap, and you possibly lose a lot of money if your first experiment goes sideways.
Also, because smaller barrels need shorter aging times, it requires less patience. 😉
Material
No two barrels are the same. Therefore, you can never get the same result twice. With every round of barrel-aging, you extract some of the flavors and aroma from the wood. And those will end up in your cocktail.
Oak barrels can, for instance, add beautiful notes of caramel and vanilla.
New or used
When you opt for a used barrel, flavors of the previous content will also go into your drink. Should you look for used casks, old Bourbon and wine barrels are popular amongst bartenders.
Generally, always go with newly charred barrels to get the most flavor out of them. The charring creates a natural filter needed for the process. Doing the charring yourself is quite a lot of extra work that you can save yourself.
Also, the denser the wood, the better its quality, and the better the barrel is suited for aging. More porous ones will prolong the process.
And finally: avoid barrels that have been painted or varnished. The wood needs to be all-natural.
You can source your barrels here: Oak Barrels Ltd, Barrels Online, Mile High Distilling, Red Head Oak Barrels, Amazon, Deep South, and Bluegrass.
Preparing your barrel right is indispensable if you want to get the best possible outcome from your barrel-aging adventure.
Check
It should not take more than a couple of hours to get this done -and a night or two to let things rest.
First, you need to inspect your barrel to ensure there are no cracks or gaps. The hoops need to sit tight as well.
Then smell the inside of the barrel and check for foreign objects like dust or other residues. Barrels can get moldy inside, so be careful with this step.
Rinse
After that, rinse your barrel three times with distilled water. Then fill in distilled water again, seal the barrel and let it sit overnight.
Please, do not use cold water for this. It must at least be at room temperature. The water will cause the barrel to swell, which makes it watertight.
So if the barrel should be leaking after one night, leave it for another and check again.
Then you can empty the barrel and let it dry upside down for a few hours. Now you are good to go. -Unless you decide to season your cask.
Season
With smaller, new barrels, you might end up with a very oaky flavor in your first batch. If you want to soften that, season your barrel first.
Ideally, you do that with a white overproof (more than 57.5% ABV) spirit. Fill your barrel with the booze and let it sit for a few hours up to a few days.
That will remove the intense oaky notes and give you a barrel-aged spirit in return.
Time to pick and prepare your cocktail. Again, stay away from recipes that ask for fresh juices or dairy ingredients. They will most likely turn bad and lead to mold developing inside your barrel.
-And you surely want to avoid that. It would mean a lot of time -and money- wasted. Plus, it is very unpleasant if you have to clean a moldy barrel. So it is strictly no fresh products.
Prepare your cocktail in a water jug or large bowl that holds more than the volume of your barrel. That way, it is easier to transfer it into the barrel.
When mixing your batch, remember that you probably want to have a control cocktail. How much you plan for this is totally up to you. All you need is a bottle in a suitable size to fill it in and store it afterward.
You can mix your tester together with the cocktail you plan to age in your barrel or separately. -I recommend doing that separately because it is easier to keep track of measurements that way.
Just make sure you do both batches on the same day and use the same ingredients.
Now use the funnel to fill your well-mixed drink through the bunghole (it is really called that) into the barrel you prepared before. Use a strainer o ensure that no foreign objects end up inside the cask.
Then seal the barrel with the bung. Make sure it sits tight so no air can come in. In theory, you created an airtight environment now. As I explained before, the barrel is never 100% airtight, and you have to plan for the angel's share.
Do the same with your tester and transfer it to a bottle you can close airtight.
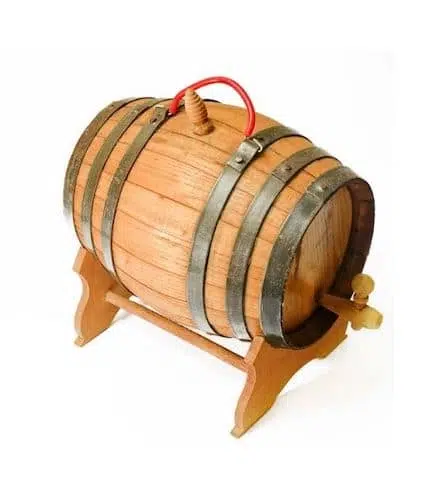
You see a lot of these small barrels displayed on counters, back bars, or shelves. While this does look cool, it actually isn't really clever. At least not if there's aging in progress.
The ideal way to store your barrel is in a dark place away from direct sunlight. The temperature should be between 50 and 70 degrees Fahrenheit - about 10 to 22 degrees Celsius.
Above that, you will lose too much liquid due to increased evaporation. Below that range, the extraction decreases significantly.
Now begins the waiting game. It makes no sense to test the contents of your barrel before at least a week has passed.
After that, I recommend you do bi-weekly checks. And don't forget to get your bottle with the tester, so you have something to which to compare the aged cocktail.
If it is not the first batch aging in that barrel, you should wait even longer, about two to three weeks for the second batch and a month for the third.
You can't age cocktails indefinitely. There definitely is a "too long", and the contents of your barrel will turn bad. So the longer you mature a cocktail, the more frequently you should be testing it.
Also, count in the testing when prepping your control cocktail, as it might have to go through quite some rounds of comparing.
Once you determine your cocktail is done aging, you have to get it out of the barrel and into bottles.
Remember to use swig-top bottles to avoid unwanted oxidation. That would very likely ruin your hard-earned results.
Also, before you fill your bottles, pour the content of the barrel through the strainer into a large jug - the one you used for mixing would make sense here.
Once your cocktail is out of the cask, the aging process stops. And if you seal your bottles perfectly and store them in a dark and cool place, they will last for years. Unopened, of course. Once you open them, it is best to empty that bottle within a few days.
Avoid recipes that require fresh juices or dairy products. Or anything else that potentially will turn bad and mold, for that matter.
Bitters or fresh elements like eggwhite can go into the cocktail at the time of serving. They don't belong in the barrel.
Refined sugar is also not ideal for barrel-aging. Use high-quality liqueurs and agave for sweetening instead.
Don't use spirits that are too low in alcohol levels. You definitely need that high-proof component to make things work.
Don't get lazy when sealing your barrel each time you pull out the bung to do a test.
And also, do not over-use your barrels. After three batches, it won't have much to give and is ready to retire.
One of the elementary rules in the life of grown-ups: you always have to clean and tidy up after basically everything you do. And it is no different with the barrel. However, luckily, it's not such a big deal in this case.
The most important thing is that the cask should not dry out between batches. Either you can do another round of aging right away - preferably with the same cocktail - or you decide to season it instead.
You could pour in some Sherry, Bourbon, or Port and let the wood soak up their beautiful aromas. Plus, you get a lovely barrel-aged spirit out of it, that also carries some notes of the cocktail you did before.
If you want to do neither, you can fill in water. That, however, needs to be changed every two or three weeks to avoid developing mold.
If you should end up with mold in your barrel after all, use pH tablets and boiling water to get rid of that.
Instead, you can also do a solution with about 30% ABV that you can use multiple times. That will prevent the cask from getting moldy, as well.
Negroni or Manhattan - or both, if you're up to it- are a great way to start your barrel-aging journey. And to avoid dilution, remember to leave off the ice when mixing your cocktails.
Ingredients
Add Angostura bitters after the aging process, on time of serving.
Same here, don't forget the batch for the control cocktail.
I'm curious. If you tried barrel-aging a cocktail at home, let me know in the comment how it went and which recipe you choose.