Barrel-aging cocktails is becoming more and more of a common practice in bars around the globe. Just like wine, beer, or spirits, cocktails can benefit from aging. And the best about it is that you can easily do barrel-aged drinks at home.
Continue reading to learn where the idea of barrel-aging came from, what happens while your cocktail ages, and how you can make your own barrel-aged cocktails at home.
What are barrel-aged cocktails?
Barrel-aging quite literally uses wood and time to change the flavor of a cocktail by letting it mature.
Usually, making a cocktail doesn't take more than a few minutes. You prep your ingredients, put them together, shake or stir them for a short while, put some garnish on, and you're good to go.
With barrel-aging, you extend that process from just a few minutes to a period of up to a few months.
For that, you prepare your cocktail just like you always do, but instead of pouring it into a glass, you fill it into a small wooden barrel and let it sit.
That allows the elements to blend even better, and the liquid absorbs some beautiful aromas from the barrel.
History of barrel-aged cocktails
The idea of aging cocktails originated in the late 19th century when bartenders filled their pre-mixed drinks in glass bottles to store and sell them.
A little later, around 1910, the American Company Hueblein Inc. published an ad where they promoted pre-mixed and wood-aged cocktails.
This ad is the first written proof of the practice of barrel-aging cocktails. But apparently, it wasn't a huge success, and the concept got neglected for almost a century.
In early 2000, aging cocktails celebrated a revival when London bartender Toni Conigliaro from 69 Colebrooke Row Bar picked up this old trend.
In 2004, he tried to barrel-age a series of classic cocktails. Long story short, the results were disappointing, and he considered the whole experiment a failure.
By then, Conigliaro was not aware that the idea had been existing already since the Victorian era. But that changed a little later when, by chance, he came across just that ad for pre-mixed, wood-aged cocktails from Hueblein.
Having had barrel-aging written off already, the ad inspired Toni Conigliaro to give bottle-aging a shot. And a few years later, after another failed attempt, this became a huge success.
When the American bartender Jeffrey Morgenthaler picked up the idea of aging cocktails during a visit to London 69 Colebrooke Row Bar in 2009, it gained full traction.
Morgenthaler decided to try the barrel-aging again, and for him, it worked beautifully. And that also marked the starting point of the new victory march of barrel-aged cocktails.
What happens during the aging process?
When Toni Conigliaro tried his glass-aged cocktails after a few years, he realized a significant change in the taste. But he wanted proof and had his aged drinks analyzed in a gas chromatograph.
And indeed, the chemicals in the alcohol had reacted and broken down one another. That eventually led to an incredible smoothness of the drink as a whole.
When barrel-aging, the wood of the cask has an additional impact on the taste. So the chemical reactions are still happening, but they include another factor, the absorption of the flavors from the wood.
The process responsible for this is called maturation and consists of three steps: Extraction, Subtraction, and Oxygenation.
- Extraction: Alcohol acts as a solvent and extracts flavor and color from the barrel.
- Subtraction or Infusion: This supports the chemical reactions of the spirits described above. And because it is common to char the inside of barrels before aging, the cocktail inside it will gradually pass through the coal. -Like a natural filter, making its contents even smoother.
- Oxidation: Because barrels - unlike glass - are porous, their contents will eventually react with the surrounding air. This process, called Oxidation, or Oxygenation, is imperative for aging cocktails. It produces new aromas, rounds out the flavors, and helps to blend all elements to achieve these beautiful and elegant drinks we know.
So when cocktails age in barrels, the maturing process often leads to surprising new aromas. It also adds more depth of flavor, almost as if the different ingredients get more used to each other over time.
Like it does for other spirits, harsher notes get smoothed out, and the drink becomes more cohesive. The barrel also adds extra flavor, depending on the type of wood and other factors I explain a little further down.
What is the angel's share?
During the whole barrel-aging process, you will lose about 10% on average of your contents to evaporation. -Depending on how long you leave your cocktail in the barrel, of course.
Some of it goes into the surrounding air. And some of the liquid is soaked up by the barrel and stays with it forever.
Both these things occur no matter how high quality your cask is and how well you seal it. And it is a good thing that it does.
It is part of the magic that happens during aging. But you need to factor in this so-called Angel's Share when planning your batch.
Which cocktails are suitable for barrel-aging?
Generally, the best choice for barrel-aging definitely is spirit-forward cocktails. The base spirit you use should be a minimum of 100 proof - or at least not much, to avoid your cocktail becoming too sweet during the process.
The combined alcohol level of the drink should neither be too low nor overly high. Somewhere between 20% to 30% in ABV is ideal, but a little higher percentage usually works, as well.
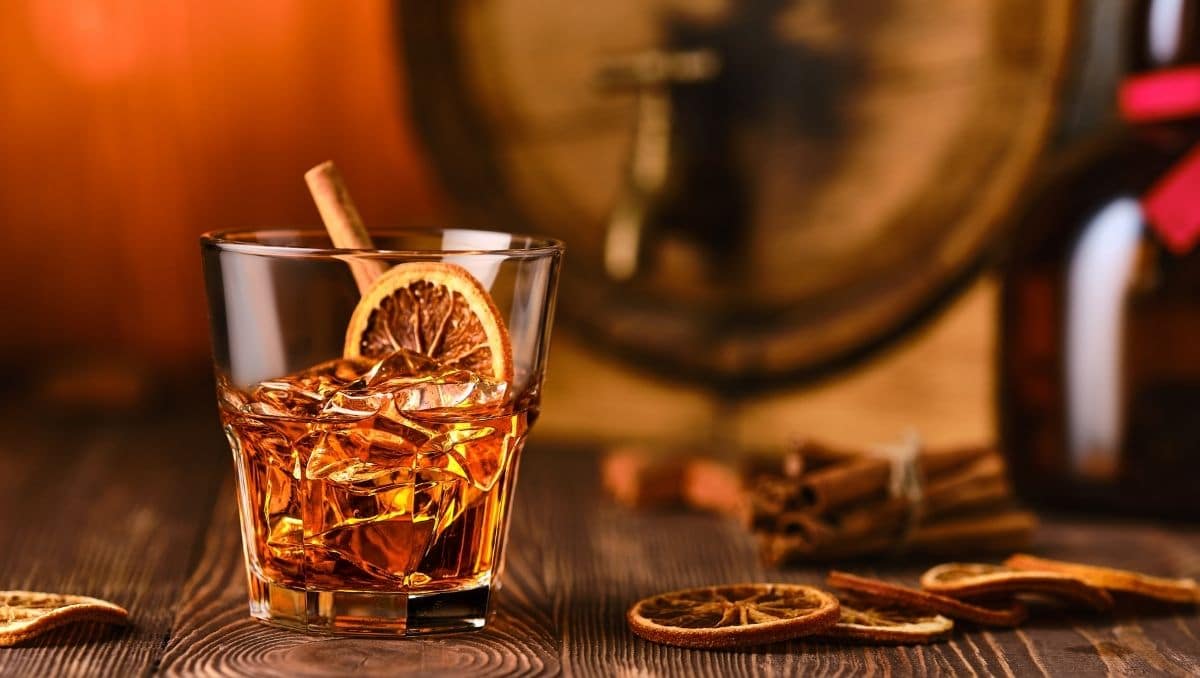
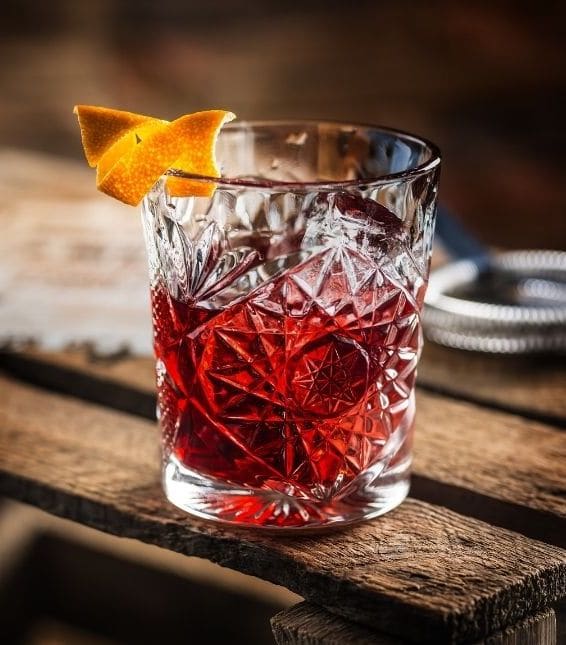
The Negroni is an excellent choice for making your first experience with barrel-aging cocktails. Also, classics like the Manhattan, the Old Fashioned, or the Boulevardier are popular and very suitable options.
With these easy-to-make cocktails, you also have the advantage of simple batching calculations.
If a recipe includes fresh ingredients, like juices or dairy, that usually have a short shelf life, they need to be replaced or left off until the time of serving.
Don't add them to the mix going into the barrel, as they will spoil the whole drink and most likely kill the cask, too.
Lemon juice, for instance, can be substituted with lemon zest, or some also use Lactart - a product made from lactic acid, to get citrus notes or sourness into your drink.
If your recipe asks for egg white, prepare the smooth foam when the cocktail has aged enough, and you can serve it to your friends or guests. - Or enjoy it yourself.
Tools required to make barrel-aged cocktails
You don't need a lot of fancy bar equipment and tools to make your own barrel-aged cocktails.
But some things come in handy when you want to achieve a great result and also make life a little easier for yourself:
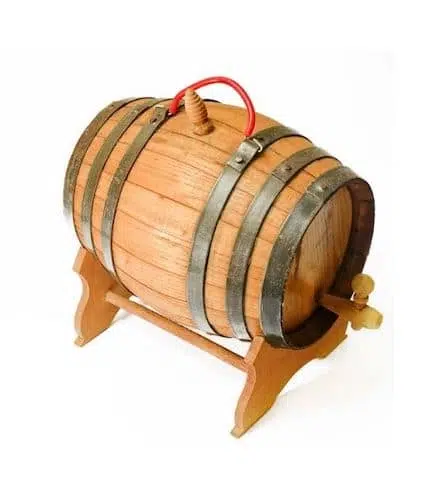
- The barrel: Because homemade barrel-aged cocktails became so popular during the last few years, there are plenty of options and sizes available. See Step 1 below for details on how to pick the right cask for your purpose.
- Bottle(s) with the correct volume: Once your cocktail is done aging, you need to fill it into a bottle for storage. Swig-top bottles are ideal as they keep out the air much better than screw-tops.
- A funnel: to help you get your drink into the bottle.
- A coffee filter
- 100 proof alcohol to prepare your barrel. Refer to Step 2 for detailed instructions.
- Distilled water for preparing your barrel. See Step 2 below.
- An auto-siphon and a hose: these are optional but can be useful if you decide on a barrel without a spigot.
How long should you age your cocktail?
The perfect aging time depends on a few factors like the size of your barrel, if it has been used previously for aging or if it's brand new.
Further, it depends on the cocktail recipe you choose and your personal preferences, as well.
Generally, you can presume that the smaller the volume of your barrel, the shorter the aging time usually should be. A standard guideline would be:
20 days for a 1-liter barrel, up to 30 days for 2 liters, up to 40 days for 3 liters, and up to 60 days for a 5-liter barrel.
These guidelines are, however, only valid for the first batch you're doing in a barrel. If the barrel has been used before, the aging time for the second badge will be considerably longer. Somewhere between double or triple the time of what the first batch took.
And if you do a third batch, this will take even longer. I'll explain the reason for this further down.
Your choice of cocktail also will have an influence. Different spirits and ingredients react differently during the aging process. And the same goes for the cask.
Depending on the wood it is made of, it will develop different notes and aromas that impact the result.
With so many variables, it is imperative that you regularly test your cocktail during the aging process. For your first batch, weekly should be fine.
Also, putting aside a control cocktail when filling your barrel is a great way to determine the progress. You can compare both and tell exactly how much your cocktail changed. And that helps a great deal when you need to make your final decision.
Can you reuse the barrel?
You probably can guess it by now: you absolutely can use your barrel more than once. However, the wood will already have absorbed some from your cocktail from the first batch.
That means the aging process of your second batch will be approximately twice or three times that of the first. And the third batch might even take up to a year.
Generally, it is not recommendable to use your barrel more than three times. The wood won't have much of its initial aromas and properties left after that.
And ideally, you always stick to the same cocktail. The barrel will always carry hints and aromas of whatever you aged in it before. The pores of the wood have an uncompromising memory.
So no matter how well you clean and prepare your barrel, you won't be able to completely erase the traces of what's been in there before.
It doesn't necessarily ruin your cocktail if you decide on double-dipping. But because barrel-aging takes quite some time, I'd say, better safe than sorry.
Step by Step Guide to making barrel-aged cocktails at home
Step 1: Pick the right barrel
There are a whole lot of options you can choose from. They have different sizes, wood quality, previously used, or all-new barrels.
Size
If you are new to barrel-aging cocktails, you should not go for a cask with more than 3 liters for your first try. Spirits are not cheap, and you possibly lose a lot of money if your first experiment goes sideways.
Also, because smaller barrels need shorter aging times, it requires less patience. 😉
Material
No two barrels are the same. Therefore, you can never get the same result twice. With every round of barrel-aging, you extract some of the flavors and aroma from the wood. And those will end up in your cocktail.
Oak barrels can, for instance, add beautiful notes of caramel and vanilla.
New or used
When you opt for a used barrel, flavors of the previous content will also go into your drink. Should you look for used casks, old Bourbon and wine barrels are popular amongst bartenders.
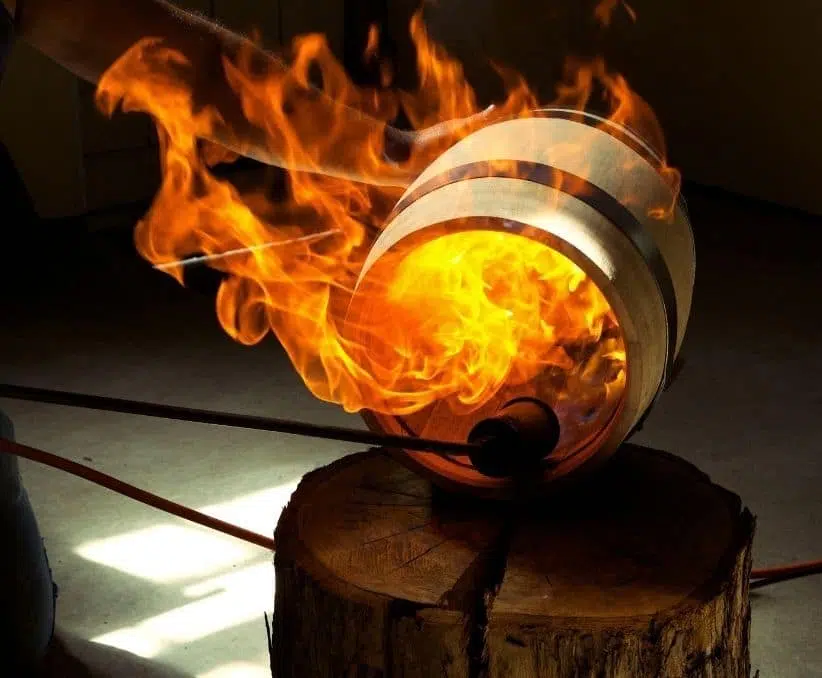
Generally, always go with newly charred barrels to get the most flavor out of them. The charring creates a natural filter needed for the process. Doing the charring yourself is quite a lot of extra work that you can save yourself.
Also, the denser the wood, the better its quality, and the better the barrel is suited for aging. More porous ones will prolong the process.
And finally: avoid barrels that have been painted or varnished. The wood needs to be all-natural.
You can source your barrels here: Oak Barrels Ltd, Barrels Online, Mile High Distilling, Red Head Oak Barrels, Amazon, Deep South, and Bluegrass.
Step 2: Prepare the barrel
Preparing your barrel right is indispensable if you want to get the best possible outcome from your barrel-aging adventure.
Check
It should not take more than a couple of hours to get this done -and a night or two to let things rest.
First, you need to inspect your barrel to ensure there are no cracks or gaps. The hoops need to sit tight as well.
Then smell the inside of the barrel and check for foreign objects like dust or other residues. Barrels can get moldy inside, so be careful with this step.
Rinse
After that, rinse your barrel three times with distilled water. Then fill in distilled water again, seal the barrel and let it sit overnight.
Please, do not use cold water for this. It must at least be at room temperature. The water will cause the barrel to swell, which makes it watertight.
So if the barrel should be leaking after one night, leave it for another and check again.
Then you can empty the barrel and let it dry upside down for a few hours. Now you are good to go. -Unless you decide to season your cask.
Season
With smaller, new barrels, you might end up with a very oaky flavor in your first batch. If you want to soften that, season your barrel first.
Ideally, you do that with a white overproof (more than 57.5% ABV) spirit. Fill your barrel with the booze and let it sit for a few hours up to a few days.
That will remove the intense oaky notes and give you a barrel-aged spirit in return.
Step 3: Mix up your cocktail
Time to pick and prepare your cocktail. Again, stay away from recipes that ask for fresh juices or dairy ingredients. They will most likely turn bad and lead to mold developing inside your barrel.
-And you surely want to avoid that. It would mean a lot of time -and money- wasted. Plus, it is very unpleasant if you have to clean a moldy barrel. So it is strictly no fresh products.
Prepare your cocktail in a water jug or large bowl that holds more than the volume of your barrel. That way, it is easier to transfer it into the barrel.
When mixing your batch, remember that you probably want to have a control cocktail. How much you plan for this is totally up to you. All you need is a bottle in a suitable size to fill it in and store it afterward.
You can mix your tester together with the cocktail you plan to age in your barrel or separately. -I recommend doing that separately because it is easier to keep track of measurements that way.
Just make sure you do both batches on the same day and use the same ingredients.
Step 4: Fill and seal your barrel
Now use the funnel to fill your well-mixed drink through the bunghole (it is really called that) into the barrel you prepared before. Use a strainer o ensure that no foreign objects end up inside the cask.
Then seal the barrel with the bung. Make sure it sits tight so no air can come in. In theory, you created an airtight environment now. As I explained before, the barrel is never 100% airtight, and you have to plan for the angel's share.
Do the same with your tester and transfer it to a bottle you can close airtight.
Step 5: Store your barrel
You see a lot of these small barrels displayed on counters, back bars, or shelves. While this does look cool, it actually isn't really clever. At least not if there's aging in progress.
The ideal way to store your barrel is in a dark place away from direct sunlight. The temperature should be between 50 and 70 degrees Fahrenheit - about 10 to 22 degrees Celsius.
Above that, you will lose too much liquid due to increased evaporation. Below that range, the extraction decreases significantly.
Step 6: Wait and check
Now begins the waiting game. It makes no sense to test the contents of your barrel before at least a week has passed.
After that, I recommend you do bi-weekly checks. And don't forget to get your bottle with the tester, so you have something to which to compare the aged cocktail.
If it is not the first batch aging in that barrel, you should wait even longer, about two to three weeks for the second batch and a month for the third.
You can't age cocktails indefinitely. There definitely is a "too long", and the contents of your barrel will turn bad. So the longer you mature a cocktail, the more frequently you should be testing it.
Also, count in the testing when prepping your control cocktail, as it might have to go through quite some rounds of comparing.
Step 7: Your barrel-aged cocktail is ready to be bottled
Once you determine your cocktail is done aging, you have to get it out of the barrel and into bottles.
Remember to use swig-top bottles to avoid unwanted oxidation. That would very likely ruin your hard-earned results.
Also, before you fill your bottles, pour the content of the barrel through the strainer into a large jug - the one you used for mixing would make sense here.
Once your cocktail is out of the cask, the aging process stops. And if you seal your bottles perfectly and store them in a dark and cool place, they will last for years. Unopened, of course. Once you open them, it is best to empty that bottle within a few days.
What to avoid when barrel-aging cocktails
Avoid recipes that require fresh juices or dairy products. Or anything else that potentially will turn bad and mold, for that matter.
Bitters or fresh elements like eggwhite can go into the cocktail at the time of serving. They don't belong in the barrel.
Refined sugar is also not ideal for barrel-aging. Use high-quality liqueurs and agave for sweetening instead.
Don't use spirits that are too low in alcohol levels. You definitely need that high-proof component to make things work.
Don't get lazy when sealing your barrel each time you pull out the bung to do a test.
And also, do not over-use your barrels. After three batches, it won't have much to give and is ready to retire.
How to clean barrels?
One of the elementary rules in the life of grown-ups: you always have to clean and tidy up after basically everything you do. And it is no different with the barrel. However, luckily, it's not such a big deal in this case.
The most important thing is that the cask should not dry out between batches. Either you can do another round of aging right away - preferably with the same cocktail - or you decide to season it instead.
You could pour in some Sherry, Bourbon, or Port and let the wood soak up their beautiful aromas. Plus, you get a lovely barrel-aged spirit out of it, that also carries some notes of the cocktail you did before.
If you want to do neither, you can fill in water. That, however, needs to be changed every two or three weeks to avoid developing mold.
If you should end up with mold in your barrel after all, use pH tablets and boiling water to get rid of that.
Instead, you can also do a solution with about 30% ABV that you can use multiple times. That will prevent the cask from getting moldy, as well.
Recipes for two of our favorite barrel-aged cocktails
Negroni or Manhattan - or both, if you're up to it- are a great way to start your barrel-aging journey. And to avoid dilution, remember to leave off the ice when mixing your cocktails.
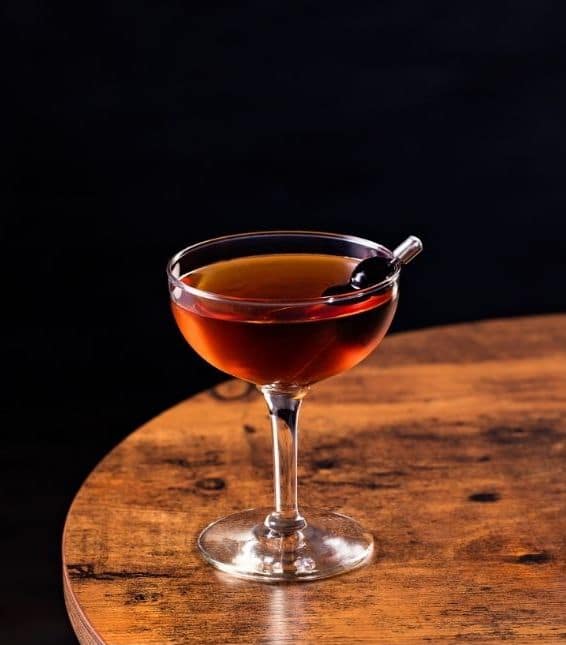
Manhattan
Ingredients
- 1.5 parts Whiskey (around 45 - 50% ABV)
- 1 part Vermouth (16 - 18% ABV)
Add Angostura bitters after the aging process, on time of serving.
Same here, don't forget the batch for the control cocktail.
Cheers!
I'm curious. If you tried barrel-aging a cocktail at home, let me know in the comment how it went and which recipe you choose.
I do both a Negroni & a Manhattan. I think I'm going on my third batch in my barrels. I let them sit at least 5 to 6 months before drinking. Both are excellent, however, I do lose quite a lot in angels share over that time. I refill throughout process as needed.
Hi Dan, I would not have the patience 😀 But I can well imagine that with an aging time of several months you lose quite a bit of volume. I'm just curious... Do you use overproof Gin for your Negroni? Cheers
Is there a way to rechar a 5 liter barrel. I have used it for 5 batches of extra aging a bourbon and now it has been cleaned but need it needs recharging.
Hey Joette,
Yes, actually you can rechar your used barrels. I've never done it myself but I've seen people doing it.
You can find some guides on YouTube that show how to do it.
Cheers,
Timo